Quick Start
Quick start guide for the AI Supervisor module
Before you begin
You will need:
MikoPBX 2025.1.1 or later;
a Mac with Apple silicon and macOS 14 or later;
network access from the Mac to the MikoPBX web interface.
Installing the module
Open the MikoPBX web interface.
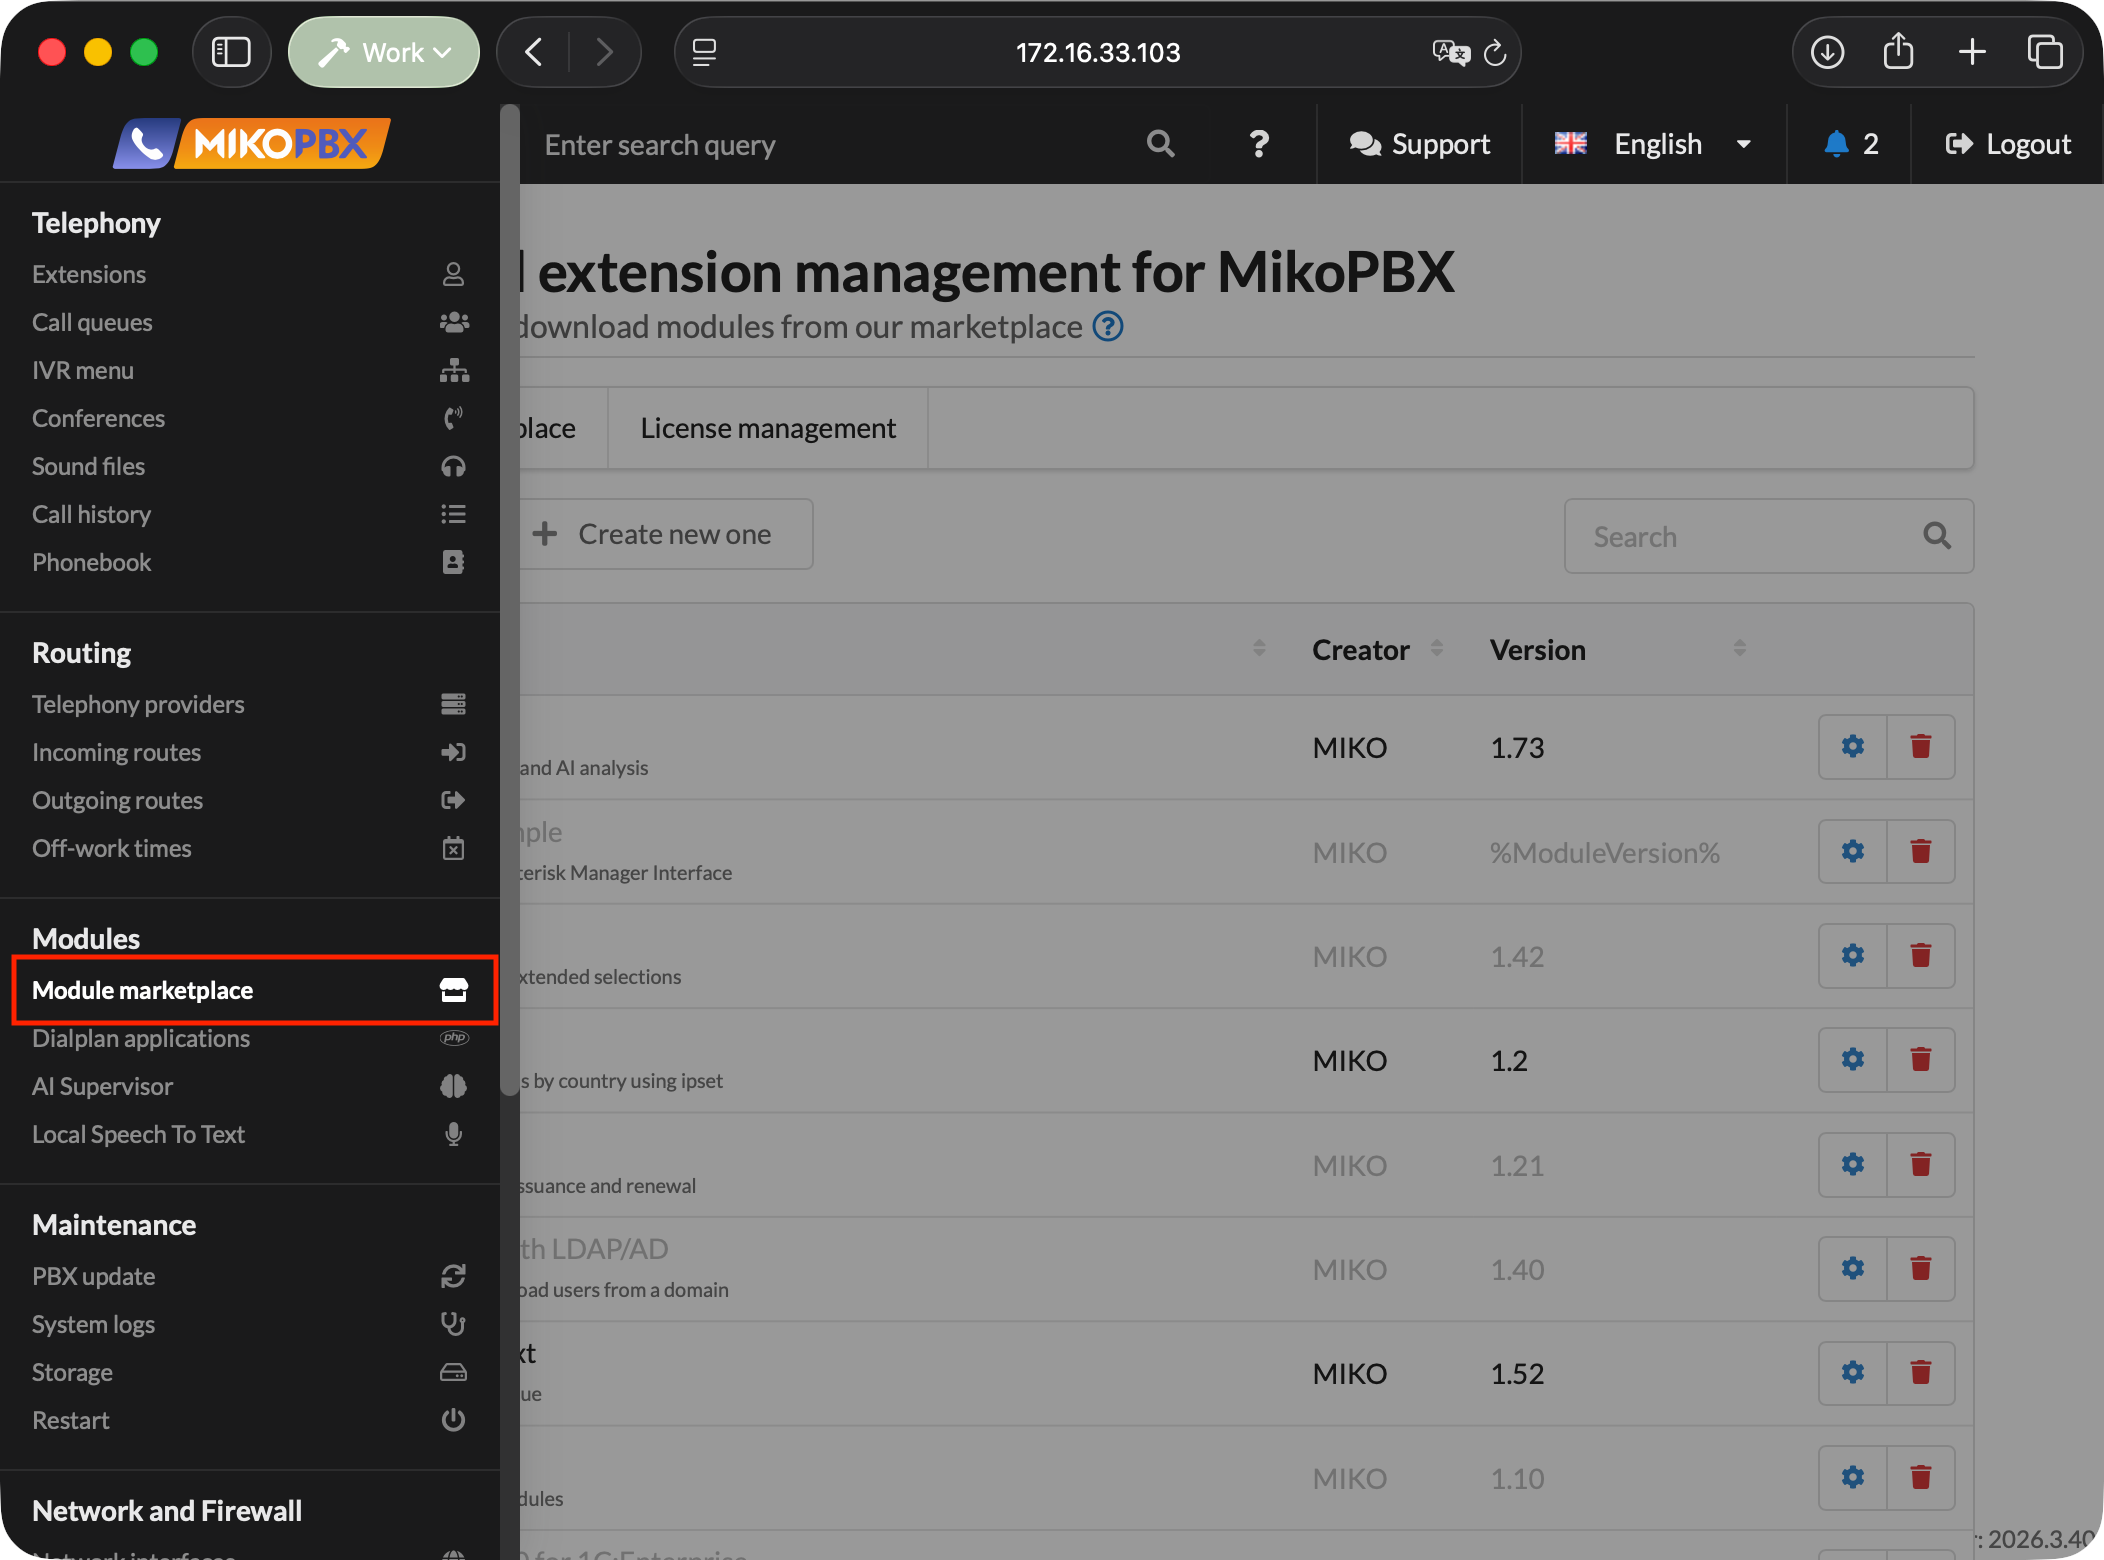
Go to Modules → Module marketplace.

Find AI Supervisor and install it.
Open the Installed modules tab and enable the module.

Click the settings button to the right of the module version.

Configuring the module
1. Create a worker key
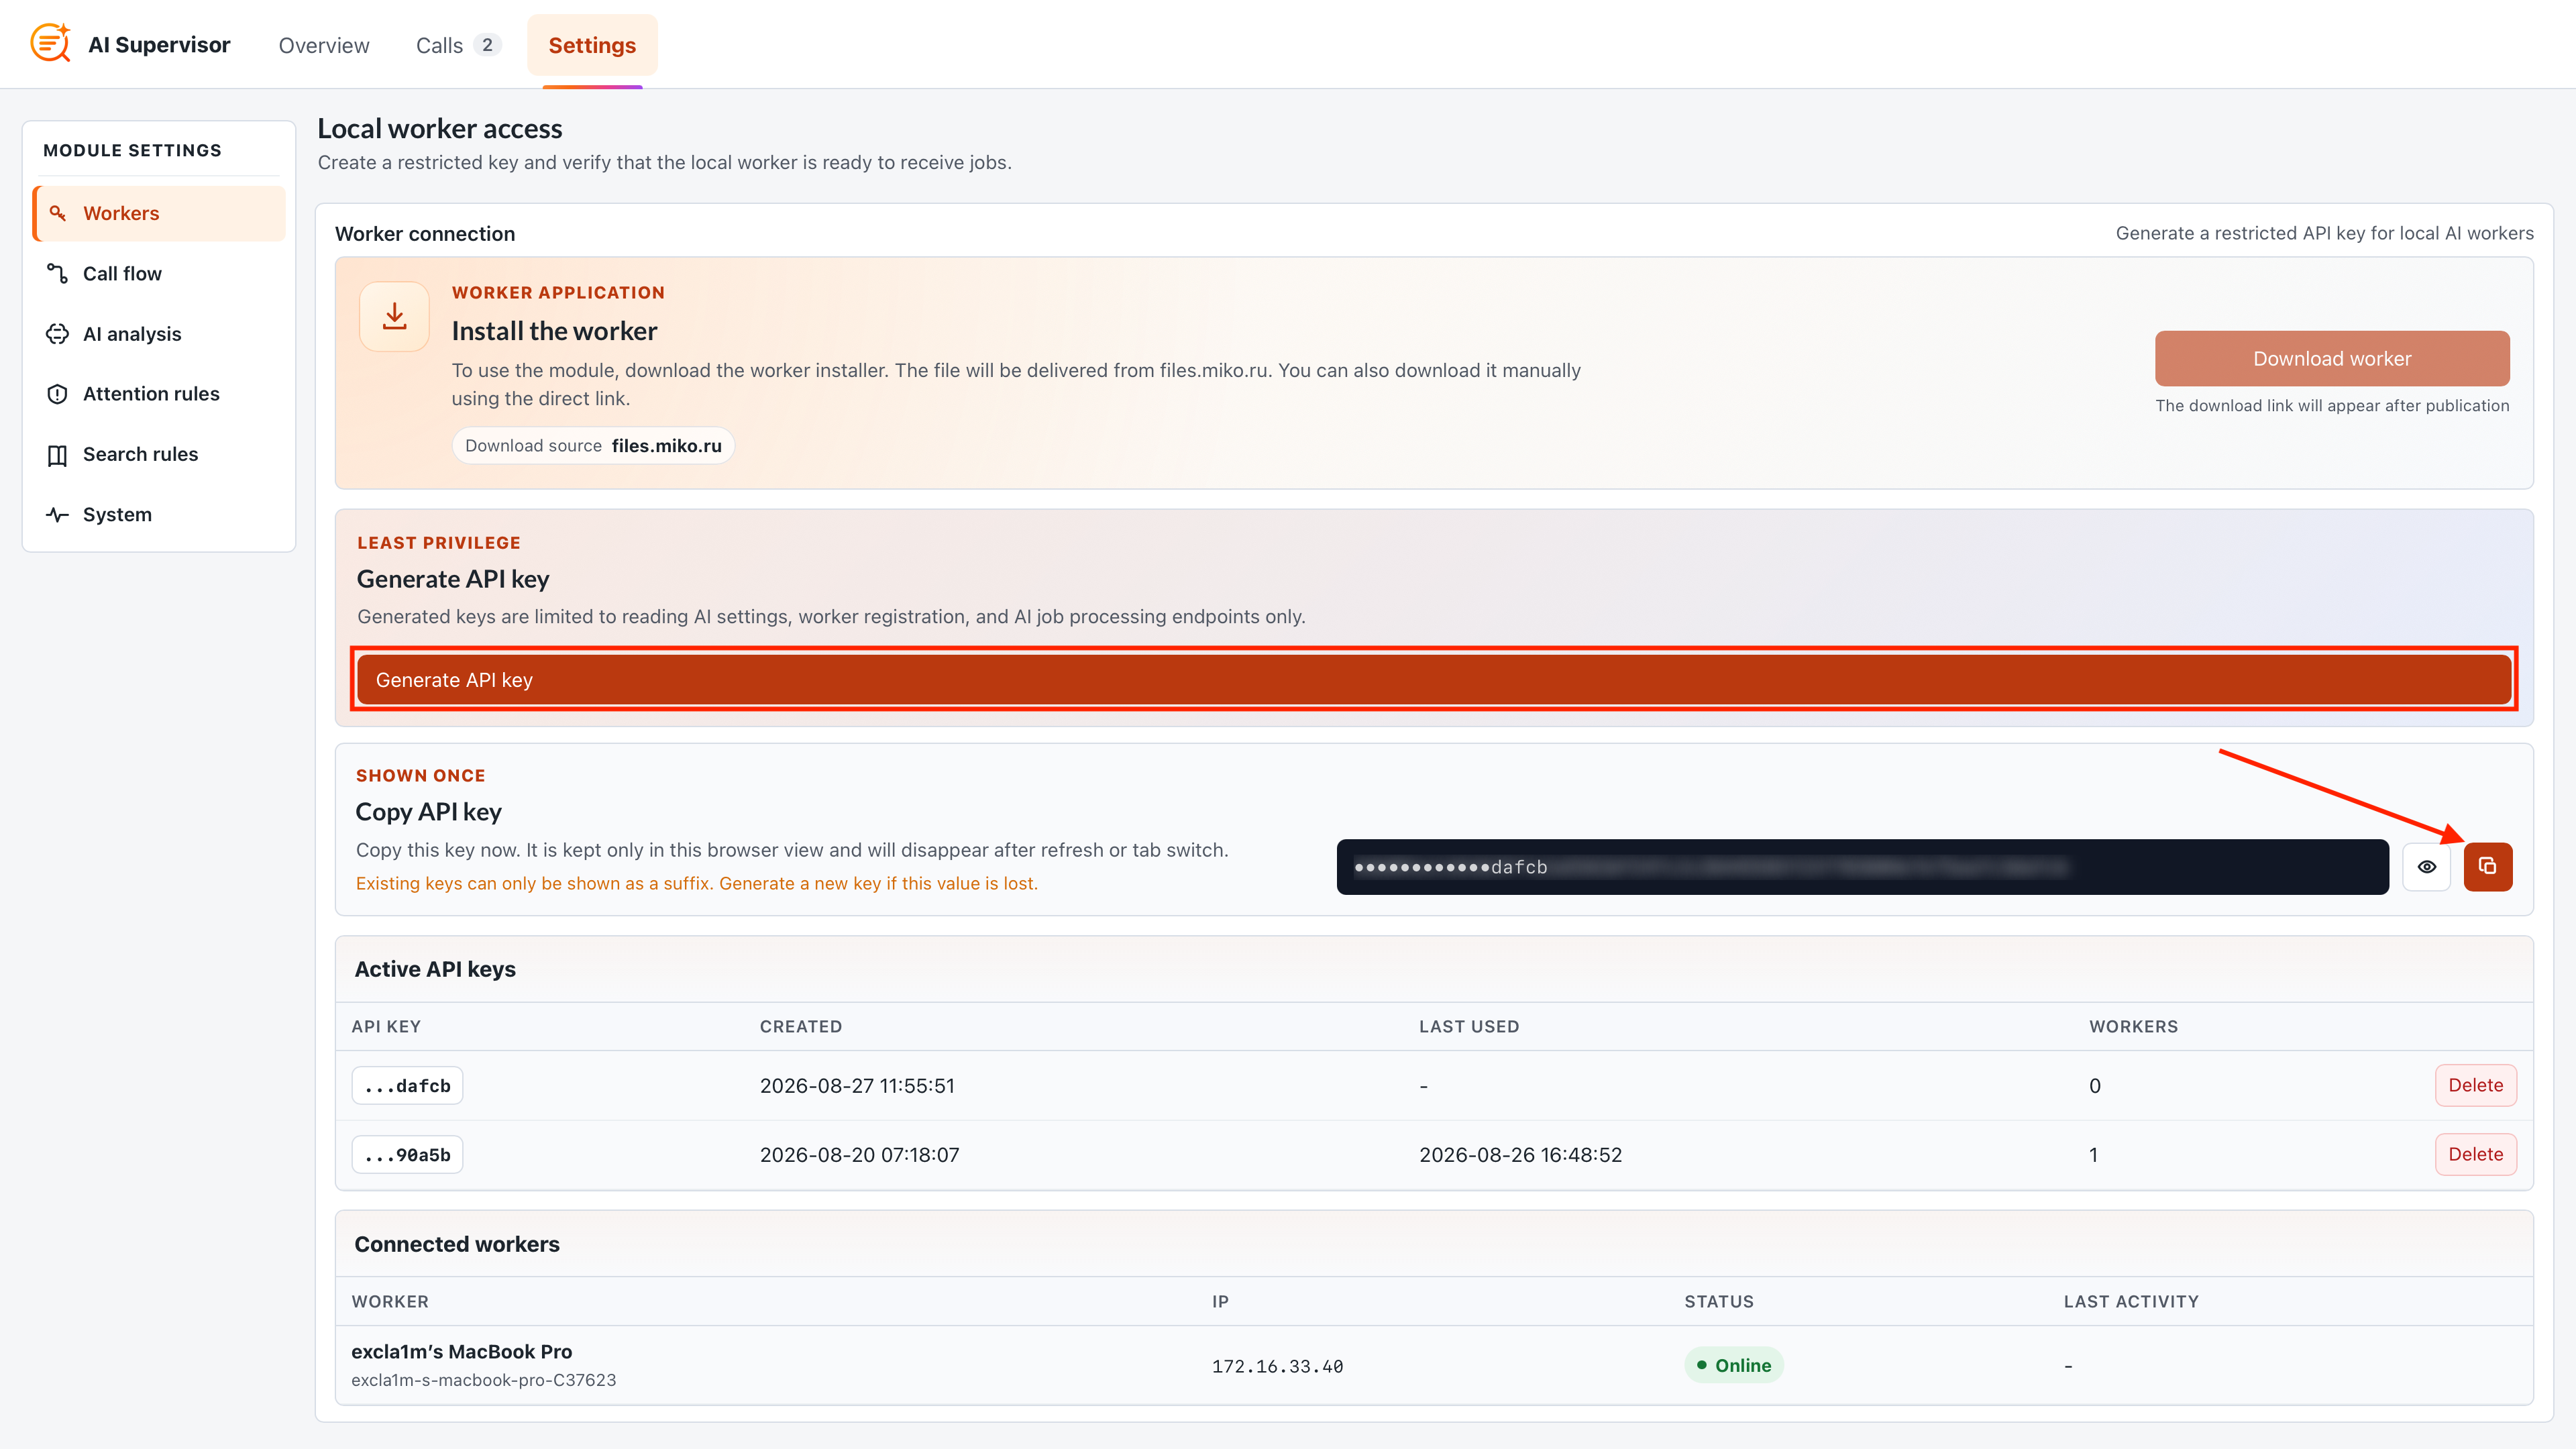
Open Settings → Workers. Click Generate API key.
Copy the displayed value. The complete key is shown only once. After you close the window, only safe information about the key remains in the list.

2. Select the analysis components and model
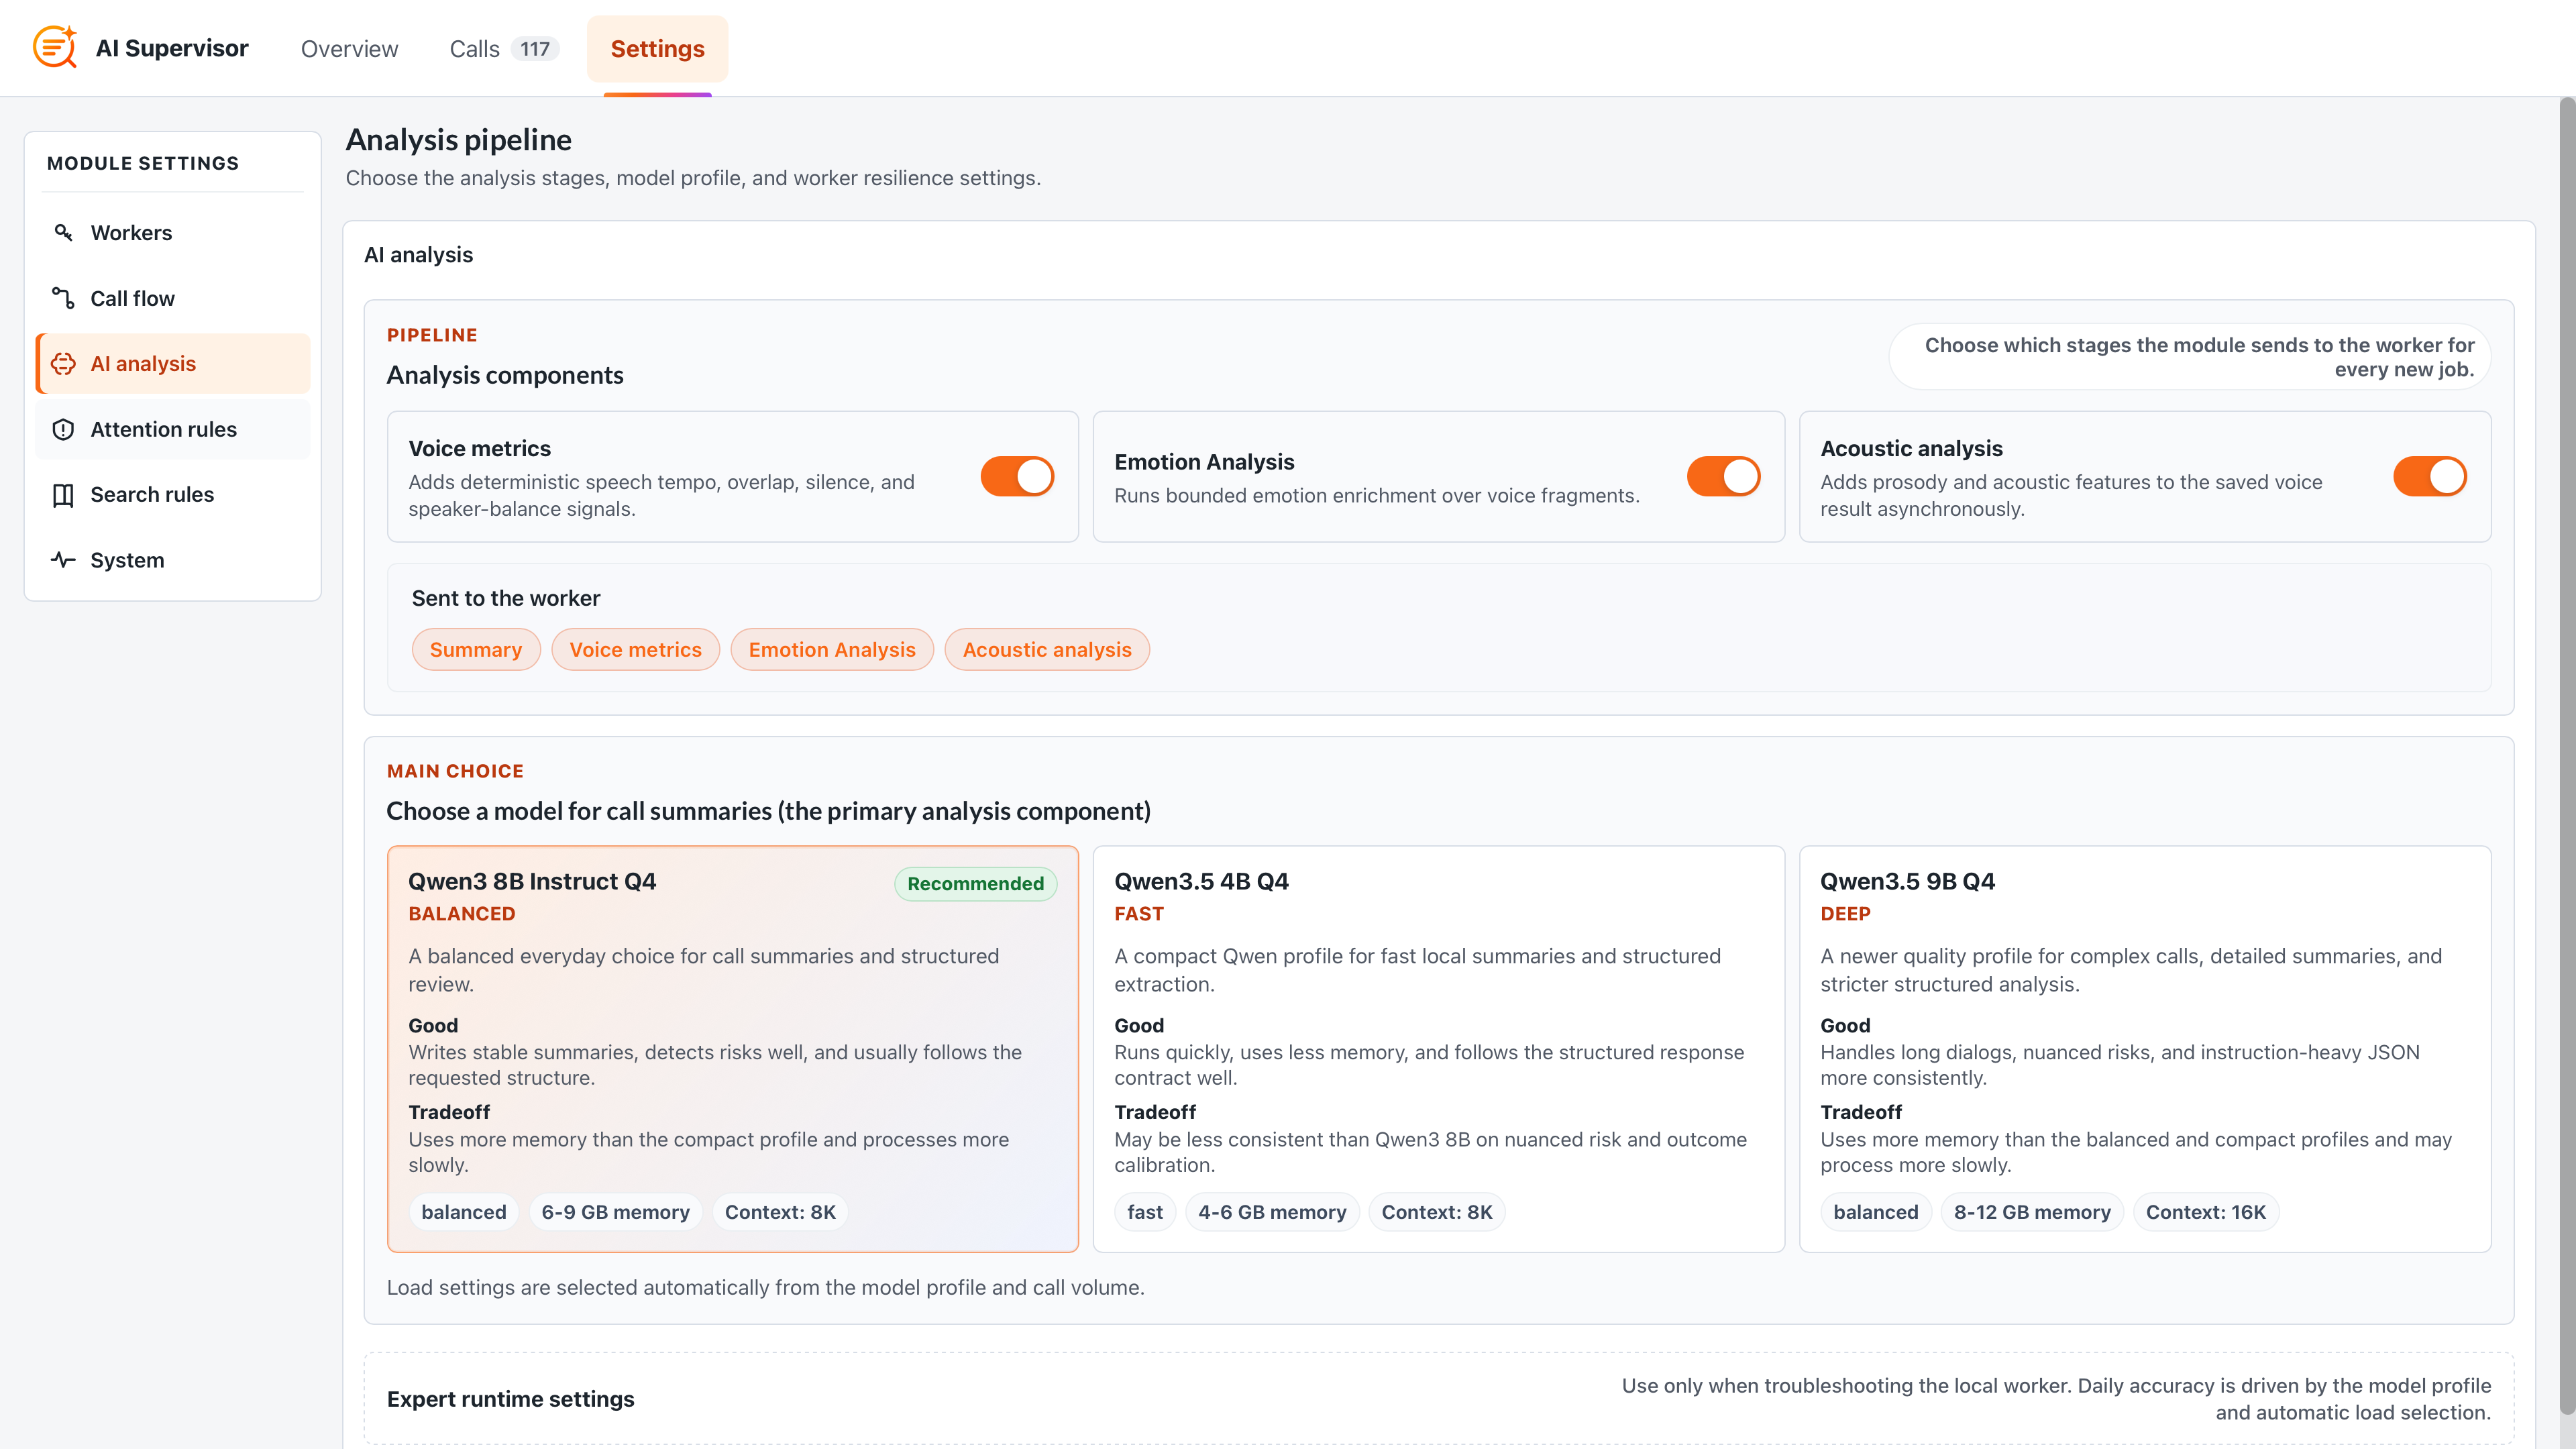
Open Settings → AI analysis.
Select the analysis pipeline components that suit your needs:
Summary — a structured call review covering topics, risks, and quality. This is the module's core component and is produced by the selected LLM.
Voice metrics — tempo, pauses, interruptions, silence, and speaker balance. This component analyzes the technical aspects of a call.
Emotion Analysis — text-based emotion detection for conversation fragments.
Acoustic analysis — detection of acoustic features in the recording with an acoustic model. It helps confirm or challenge the results of voice metrics and LLM-based emotion analysis.
Also select a model profile. See AI analysis for more information.

3. Enable the call flow
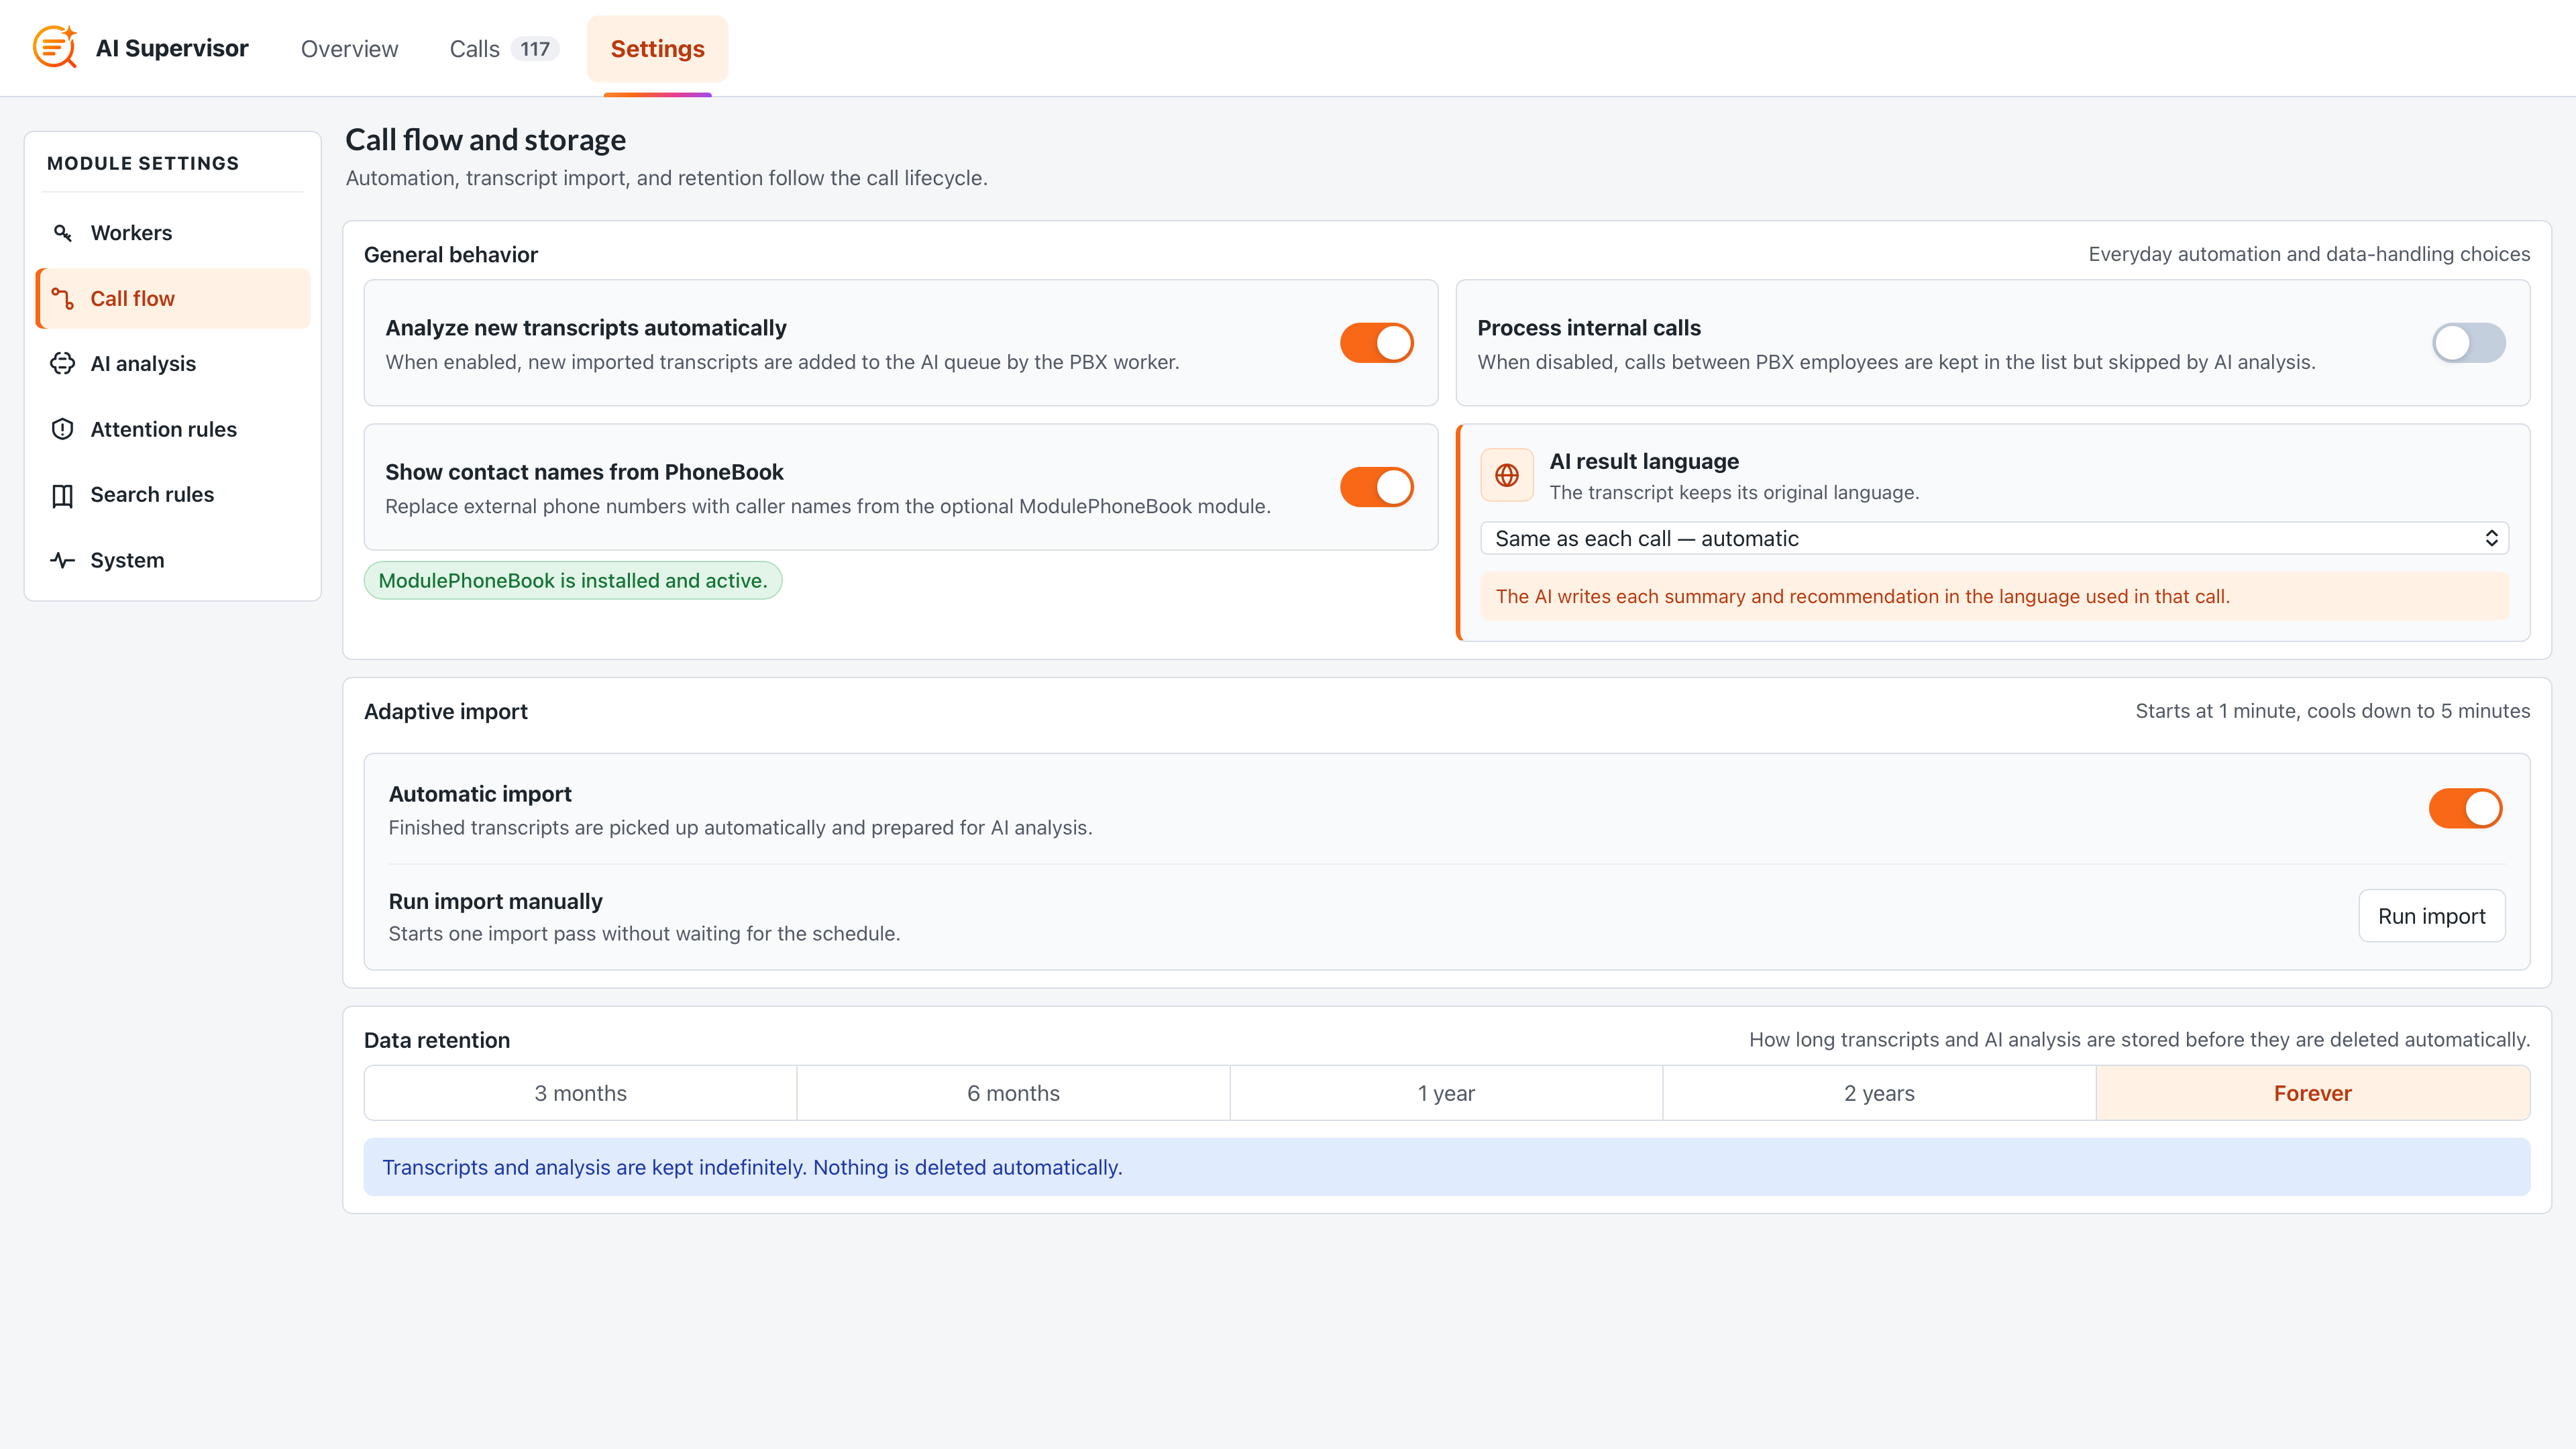
Open Settings → Call flow and check that:
Automatically analyze new transcripts is enabled;
Automatic import is enabled;
the required AI result language is selected;
Process internal calls is enabled if required;
an appropriate data retention period is selected.

Configuring AI Supervisor Worker
1. Install the application
Open Workers, click Download worker, and install the downloaded DMG.
2. Select the language
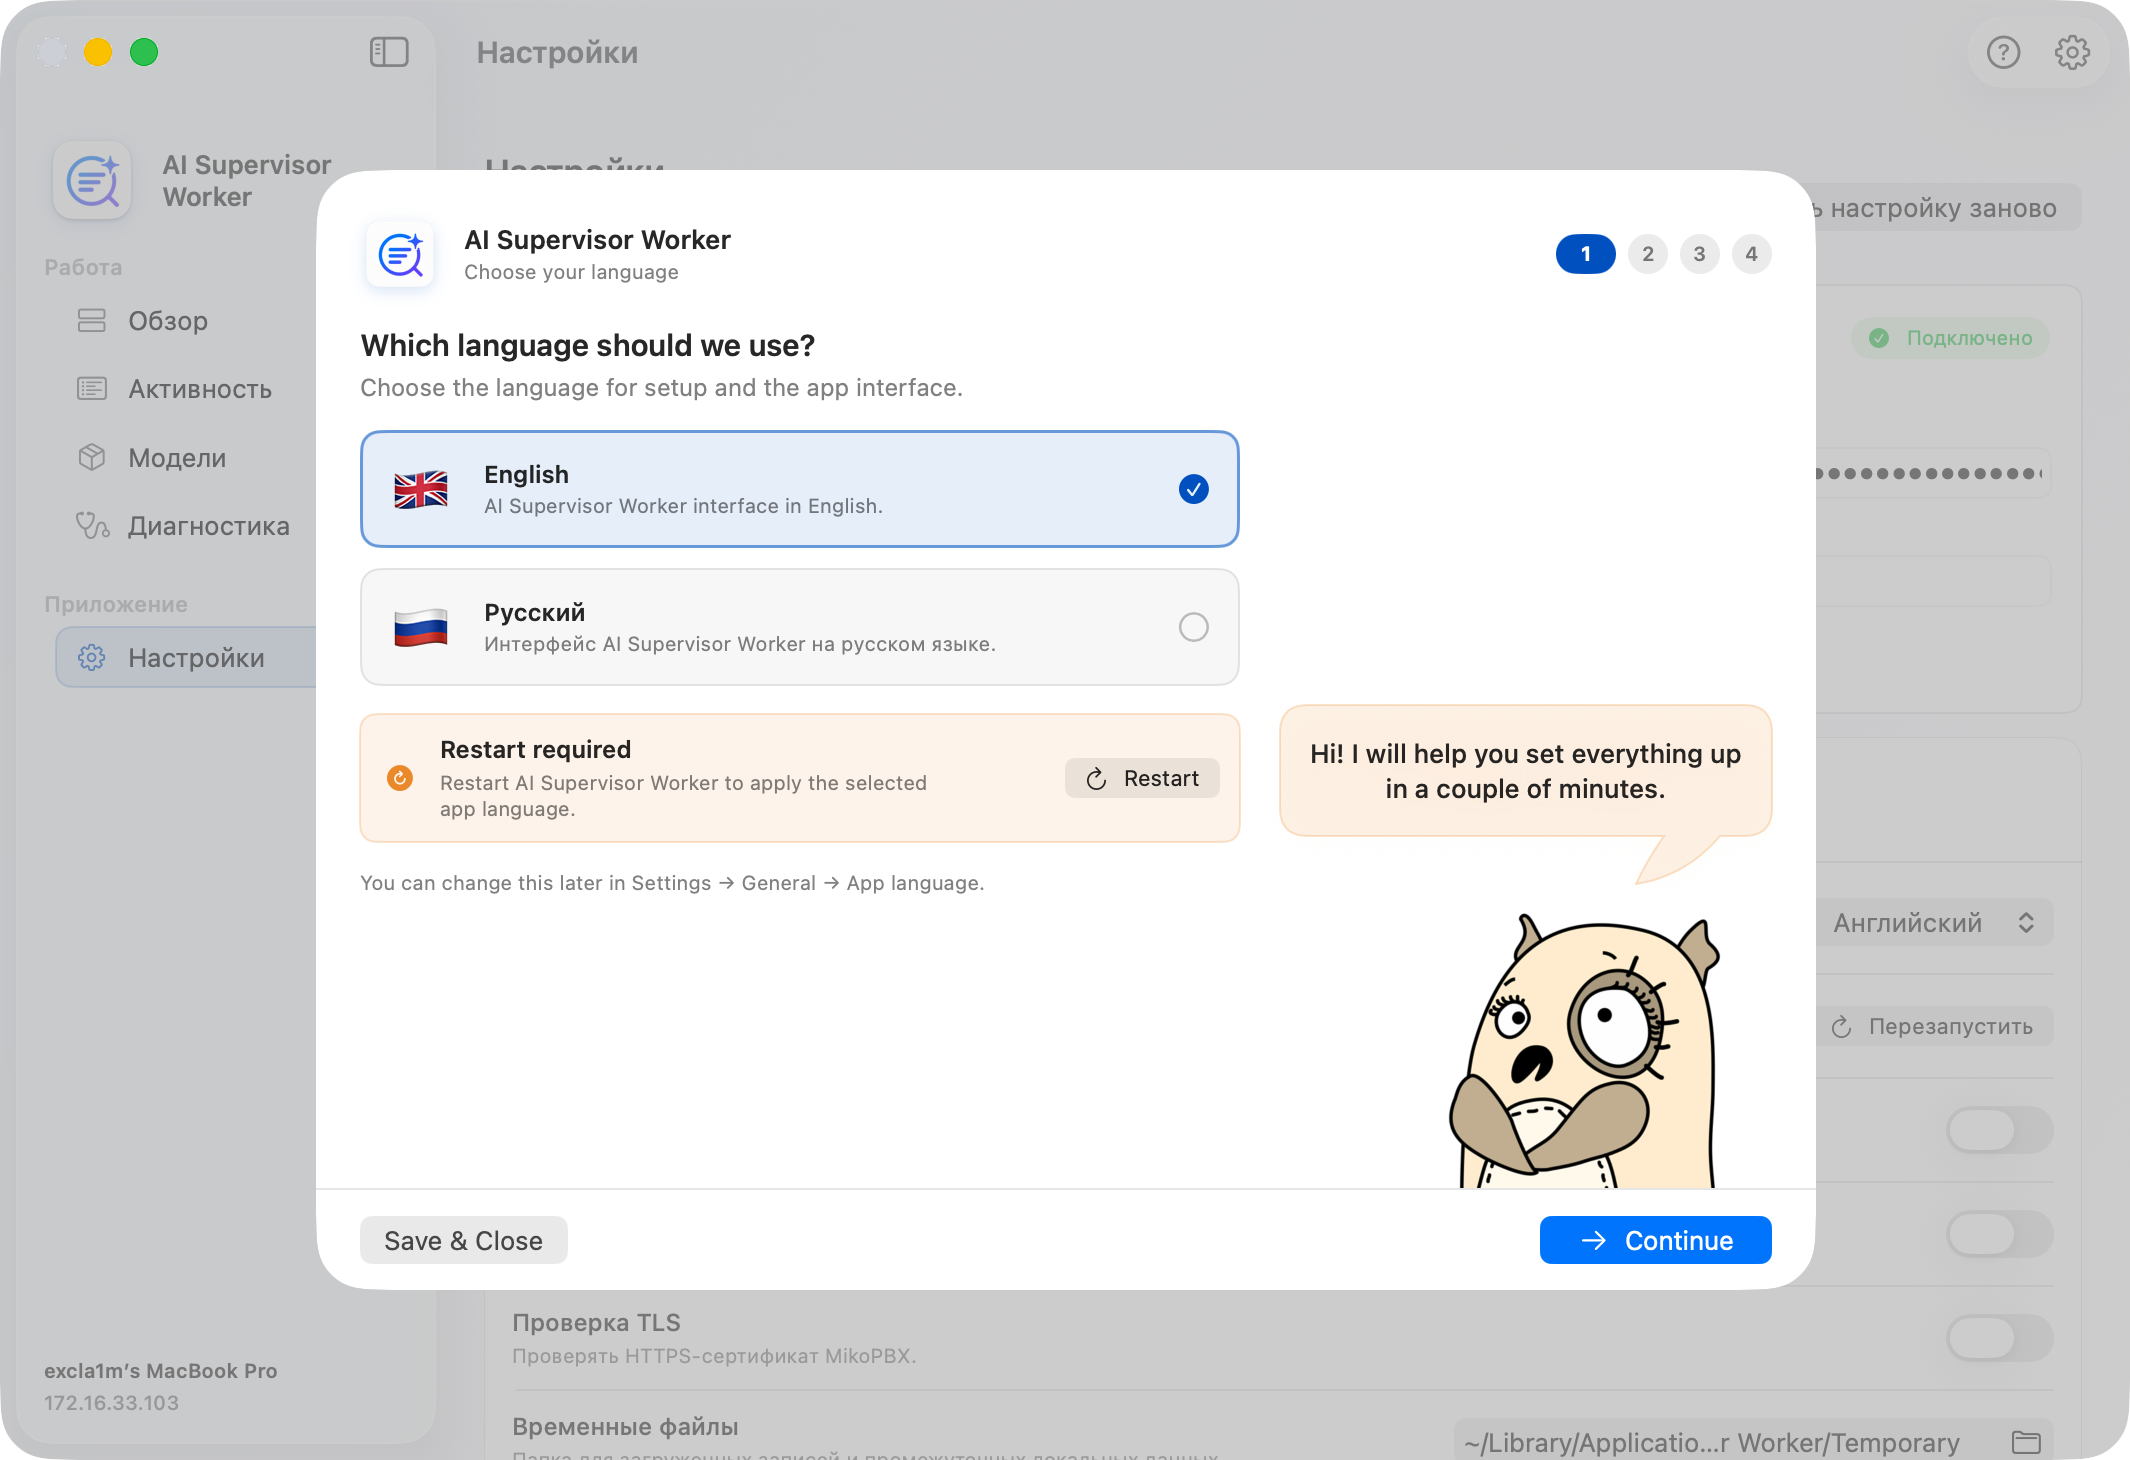
Open AI Supervisor Worker. On the first screen, select the interface language and click Continue. Restart the application if it prompts you to do so after the language change.

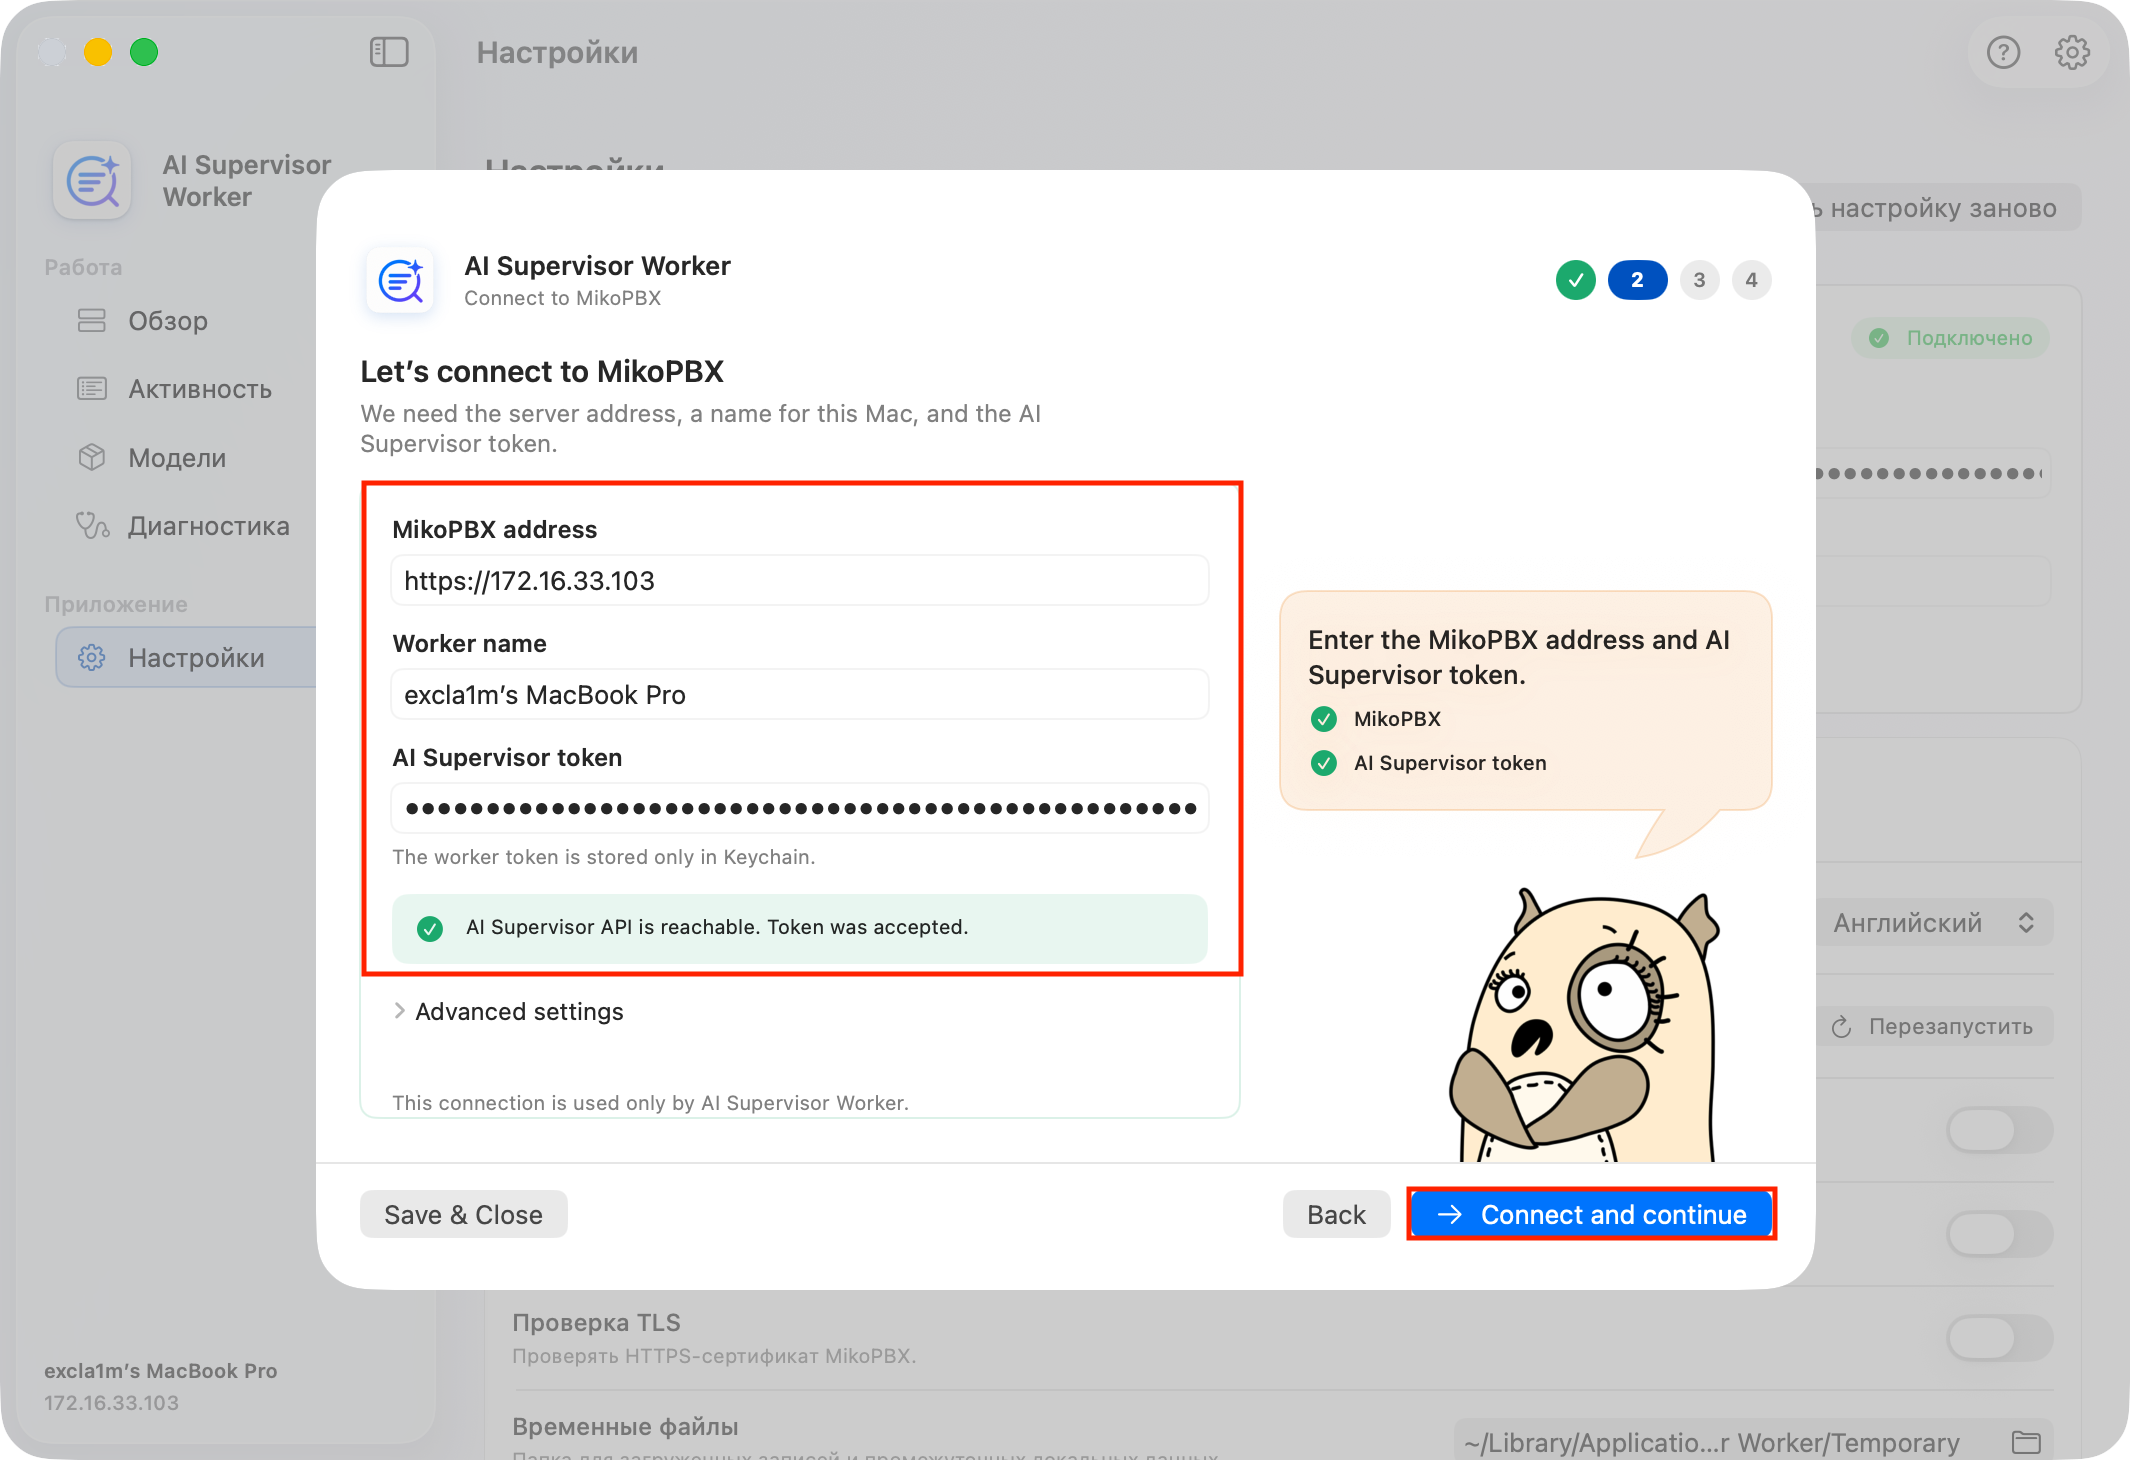
3. Connect to MikoPBX
On the connection screen, enter:
the MikoPBX address in
https://...orhttp://...format;a friendly name for this Mac;
the AI Supervisor worker key created earlier in the module.
Open Advanced settings only if you need to change the stable Worker UID, TLS verification, or select a custom PEM CA file. Click Connect and continue. The application verifies the address, key, and worker API v2 contract.

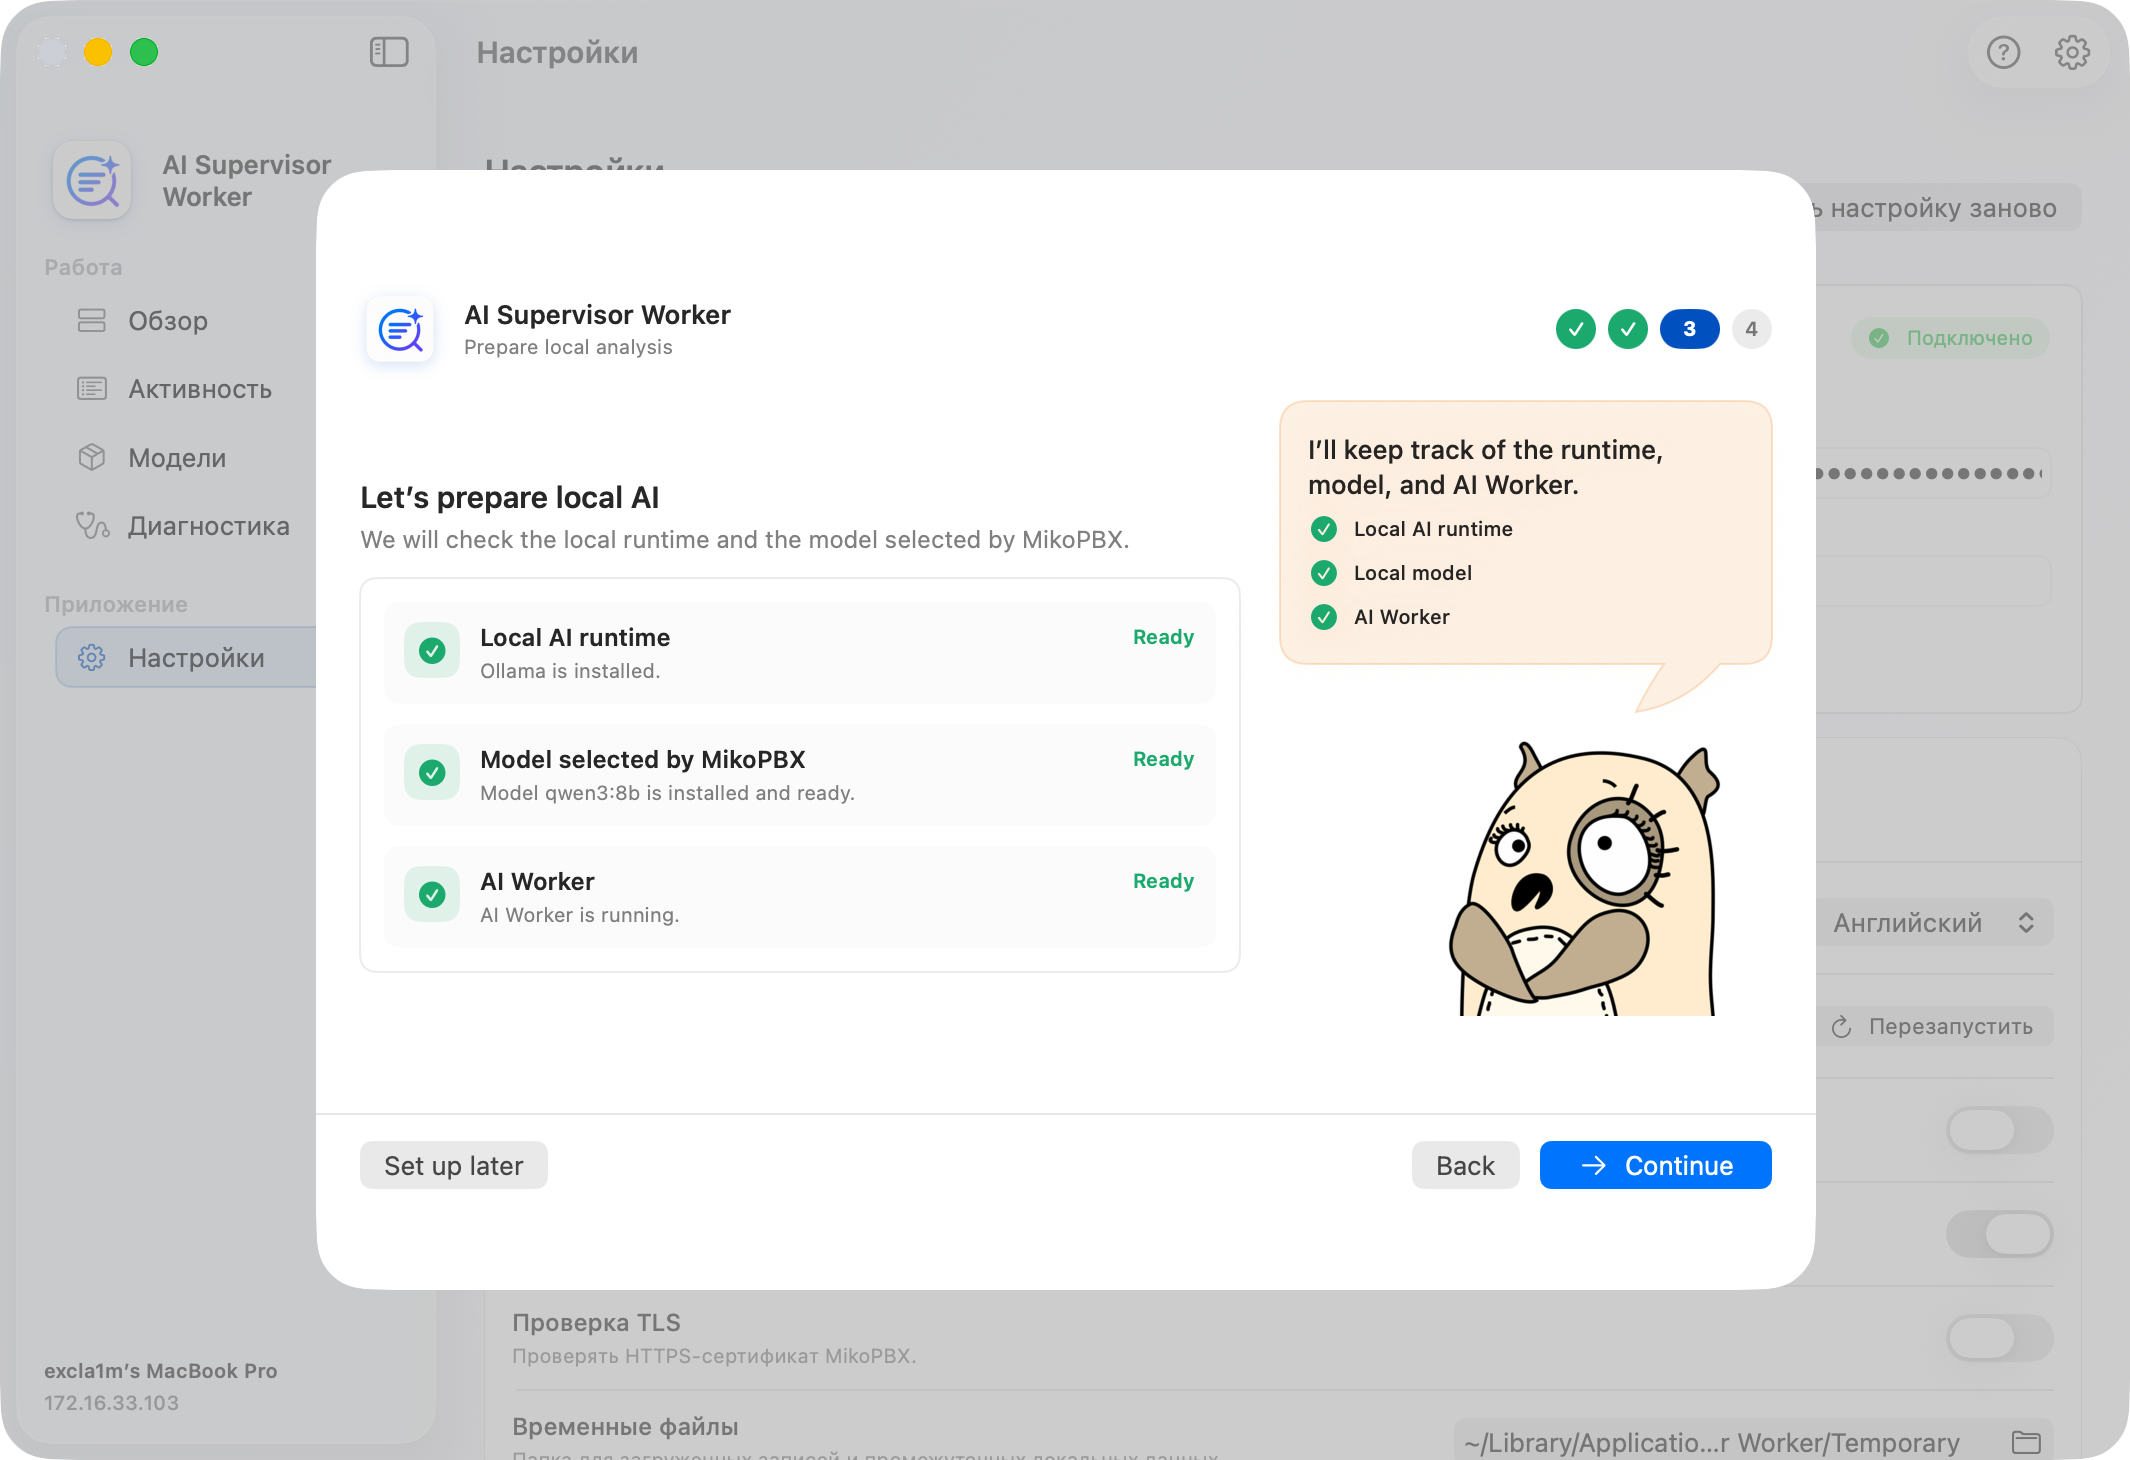
4. Prepare local AI
On the Prepare local analysis screen, the application checks in sequence:
the local Ollama runtime;
the model selected in MikoPBX;
worker readiness.
If Ollama is not installed, click Install Ollama. After installation, click Prepare and start. The application downloads the selected model, registers this Mac, and starts the worker.
The first model download may take a long time. Do not close the application, and make sure the Mac has enough free disk space.

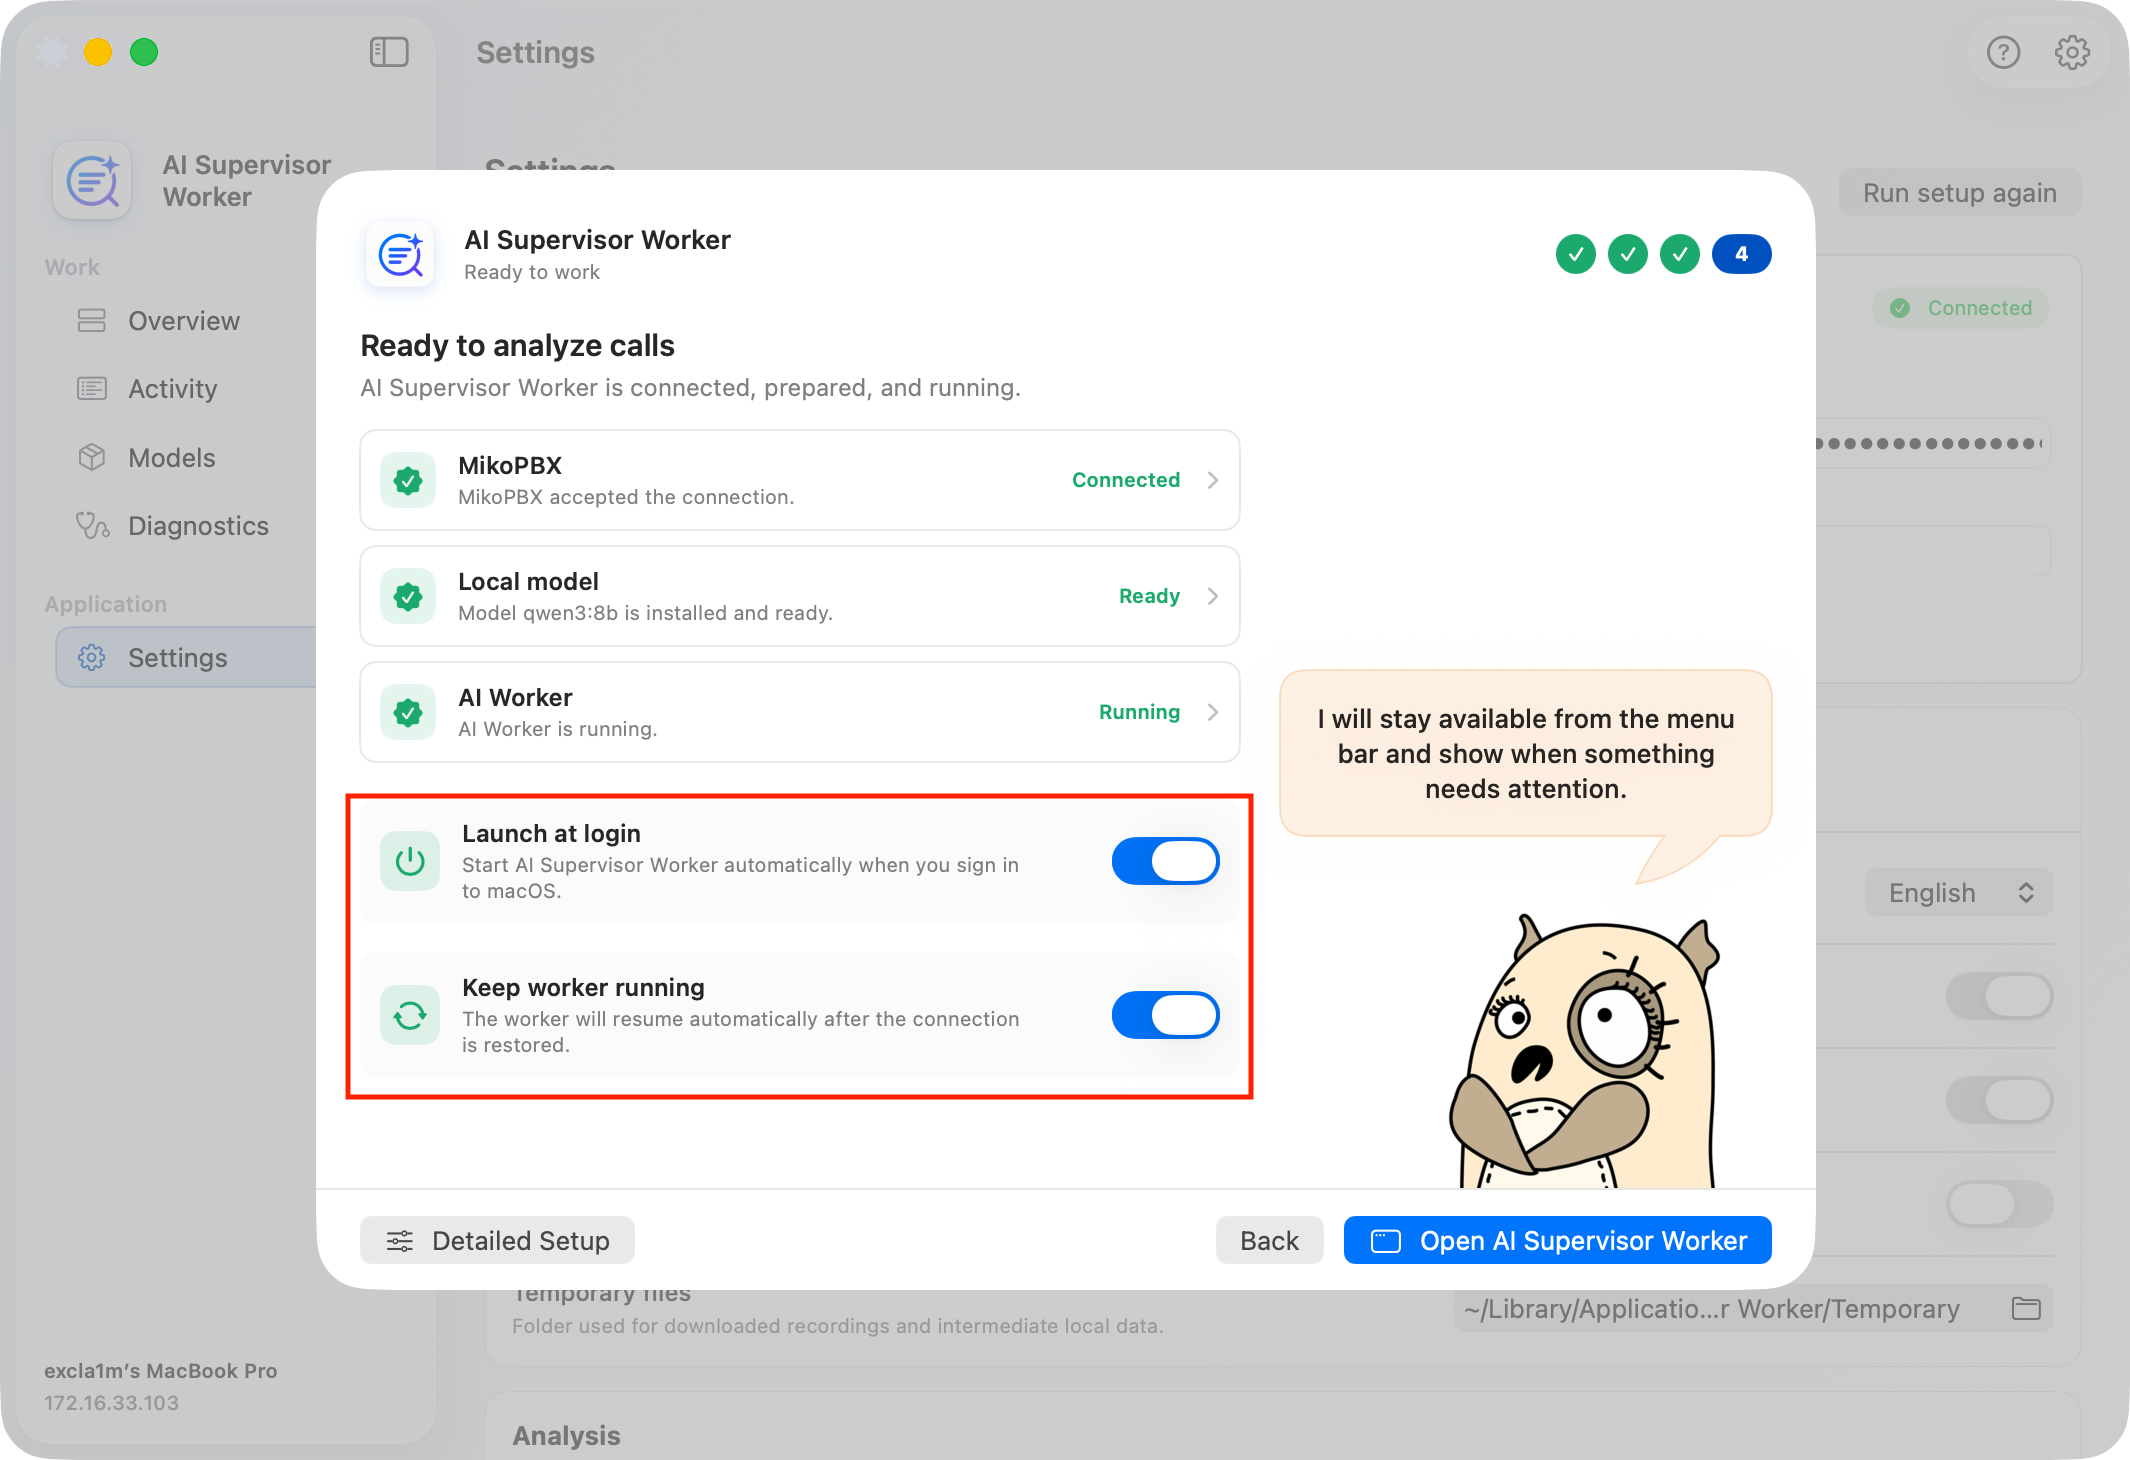
5. Finish setup
On the final screen, check the MikoPBX, Local model, and AI Worker states.
If necessary, enable:
Launch at login — the application opens automatically when you sign in to macOS.
Keep worker running — the worker automatically resumes after the network or PBX connection is restored, or after the Mac wakes from sleep.
Click Open AI Supervisor Worker.

Verifying the result
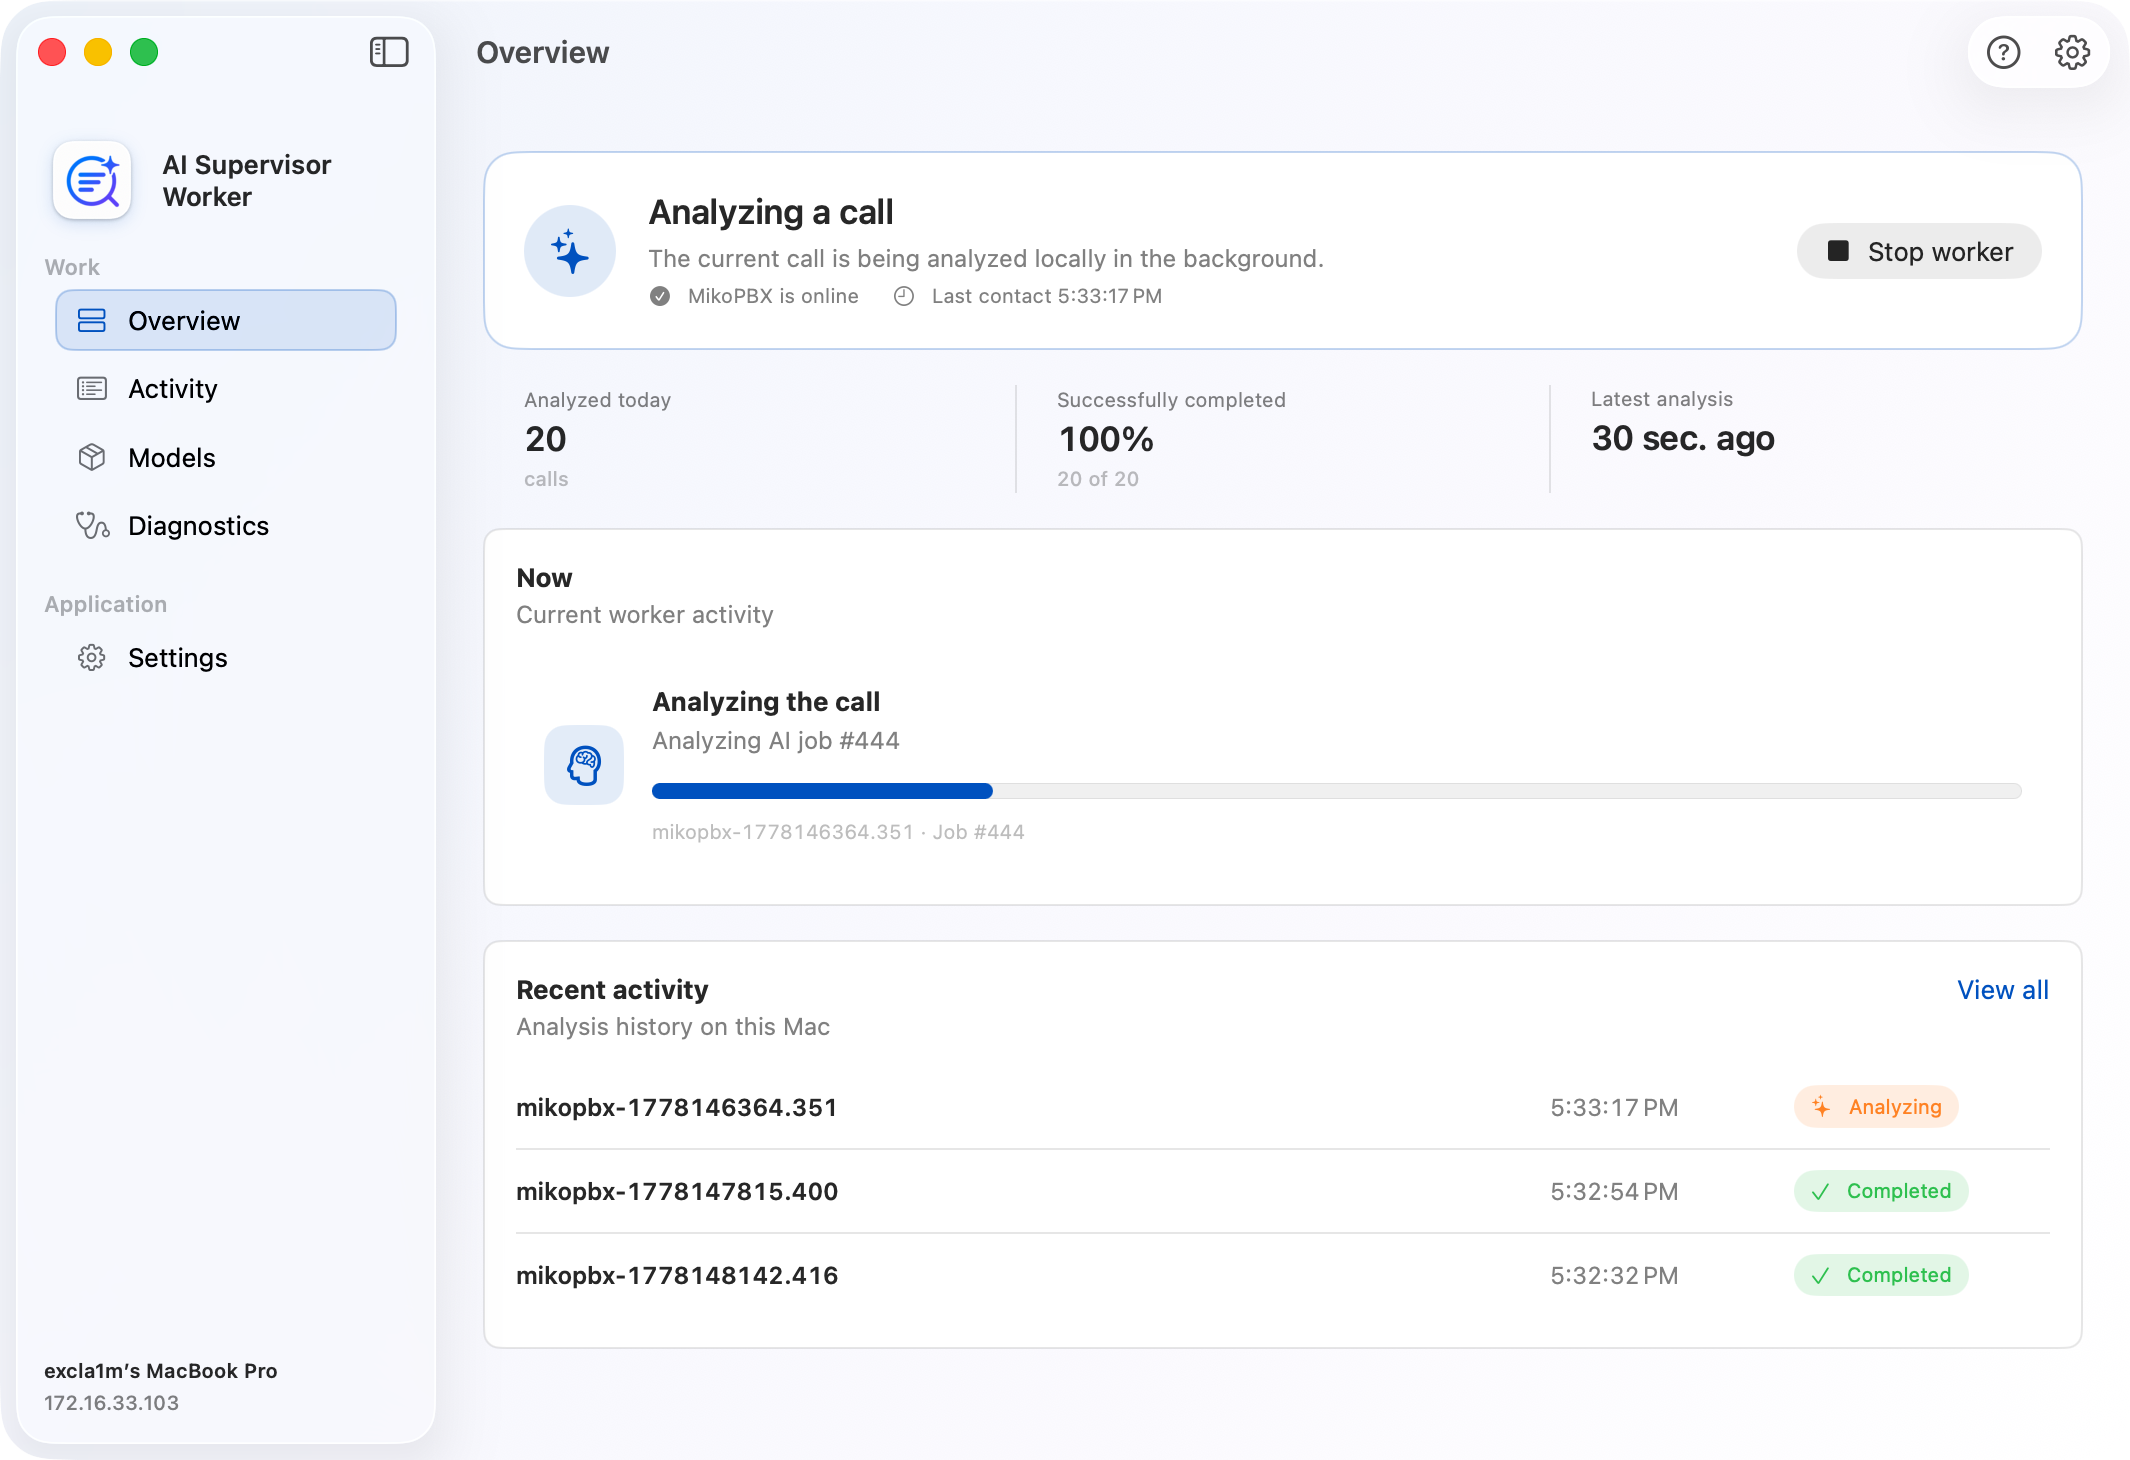
In AI Supervisor Worker, open Overview. The status should show that the worker is ready for the next job.
In MikoPBX, open Settings → System → Processing and make sure jobs move from waiting to in progress.
When processing finishes, open the Calls tab and select the processed call.

Last updated
Was this helpful?