> For the complete documentation index, see [llms.txt](https://docs.mikopbx.com/mikopbx/llms.txt). Markdown versions of documentation pages are available by appending `.md` to page URLs; this page is available as [Markdown](https://docs.mikopbx.com/mikopbx/english/modules/miko/module-routing-map.md).
# Call Routing Map
Read-only routing diagram for MikoPBX: inspect incoming and outgoing call paths as an interactive graph built from the current PBX configuration.
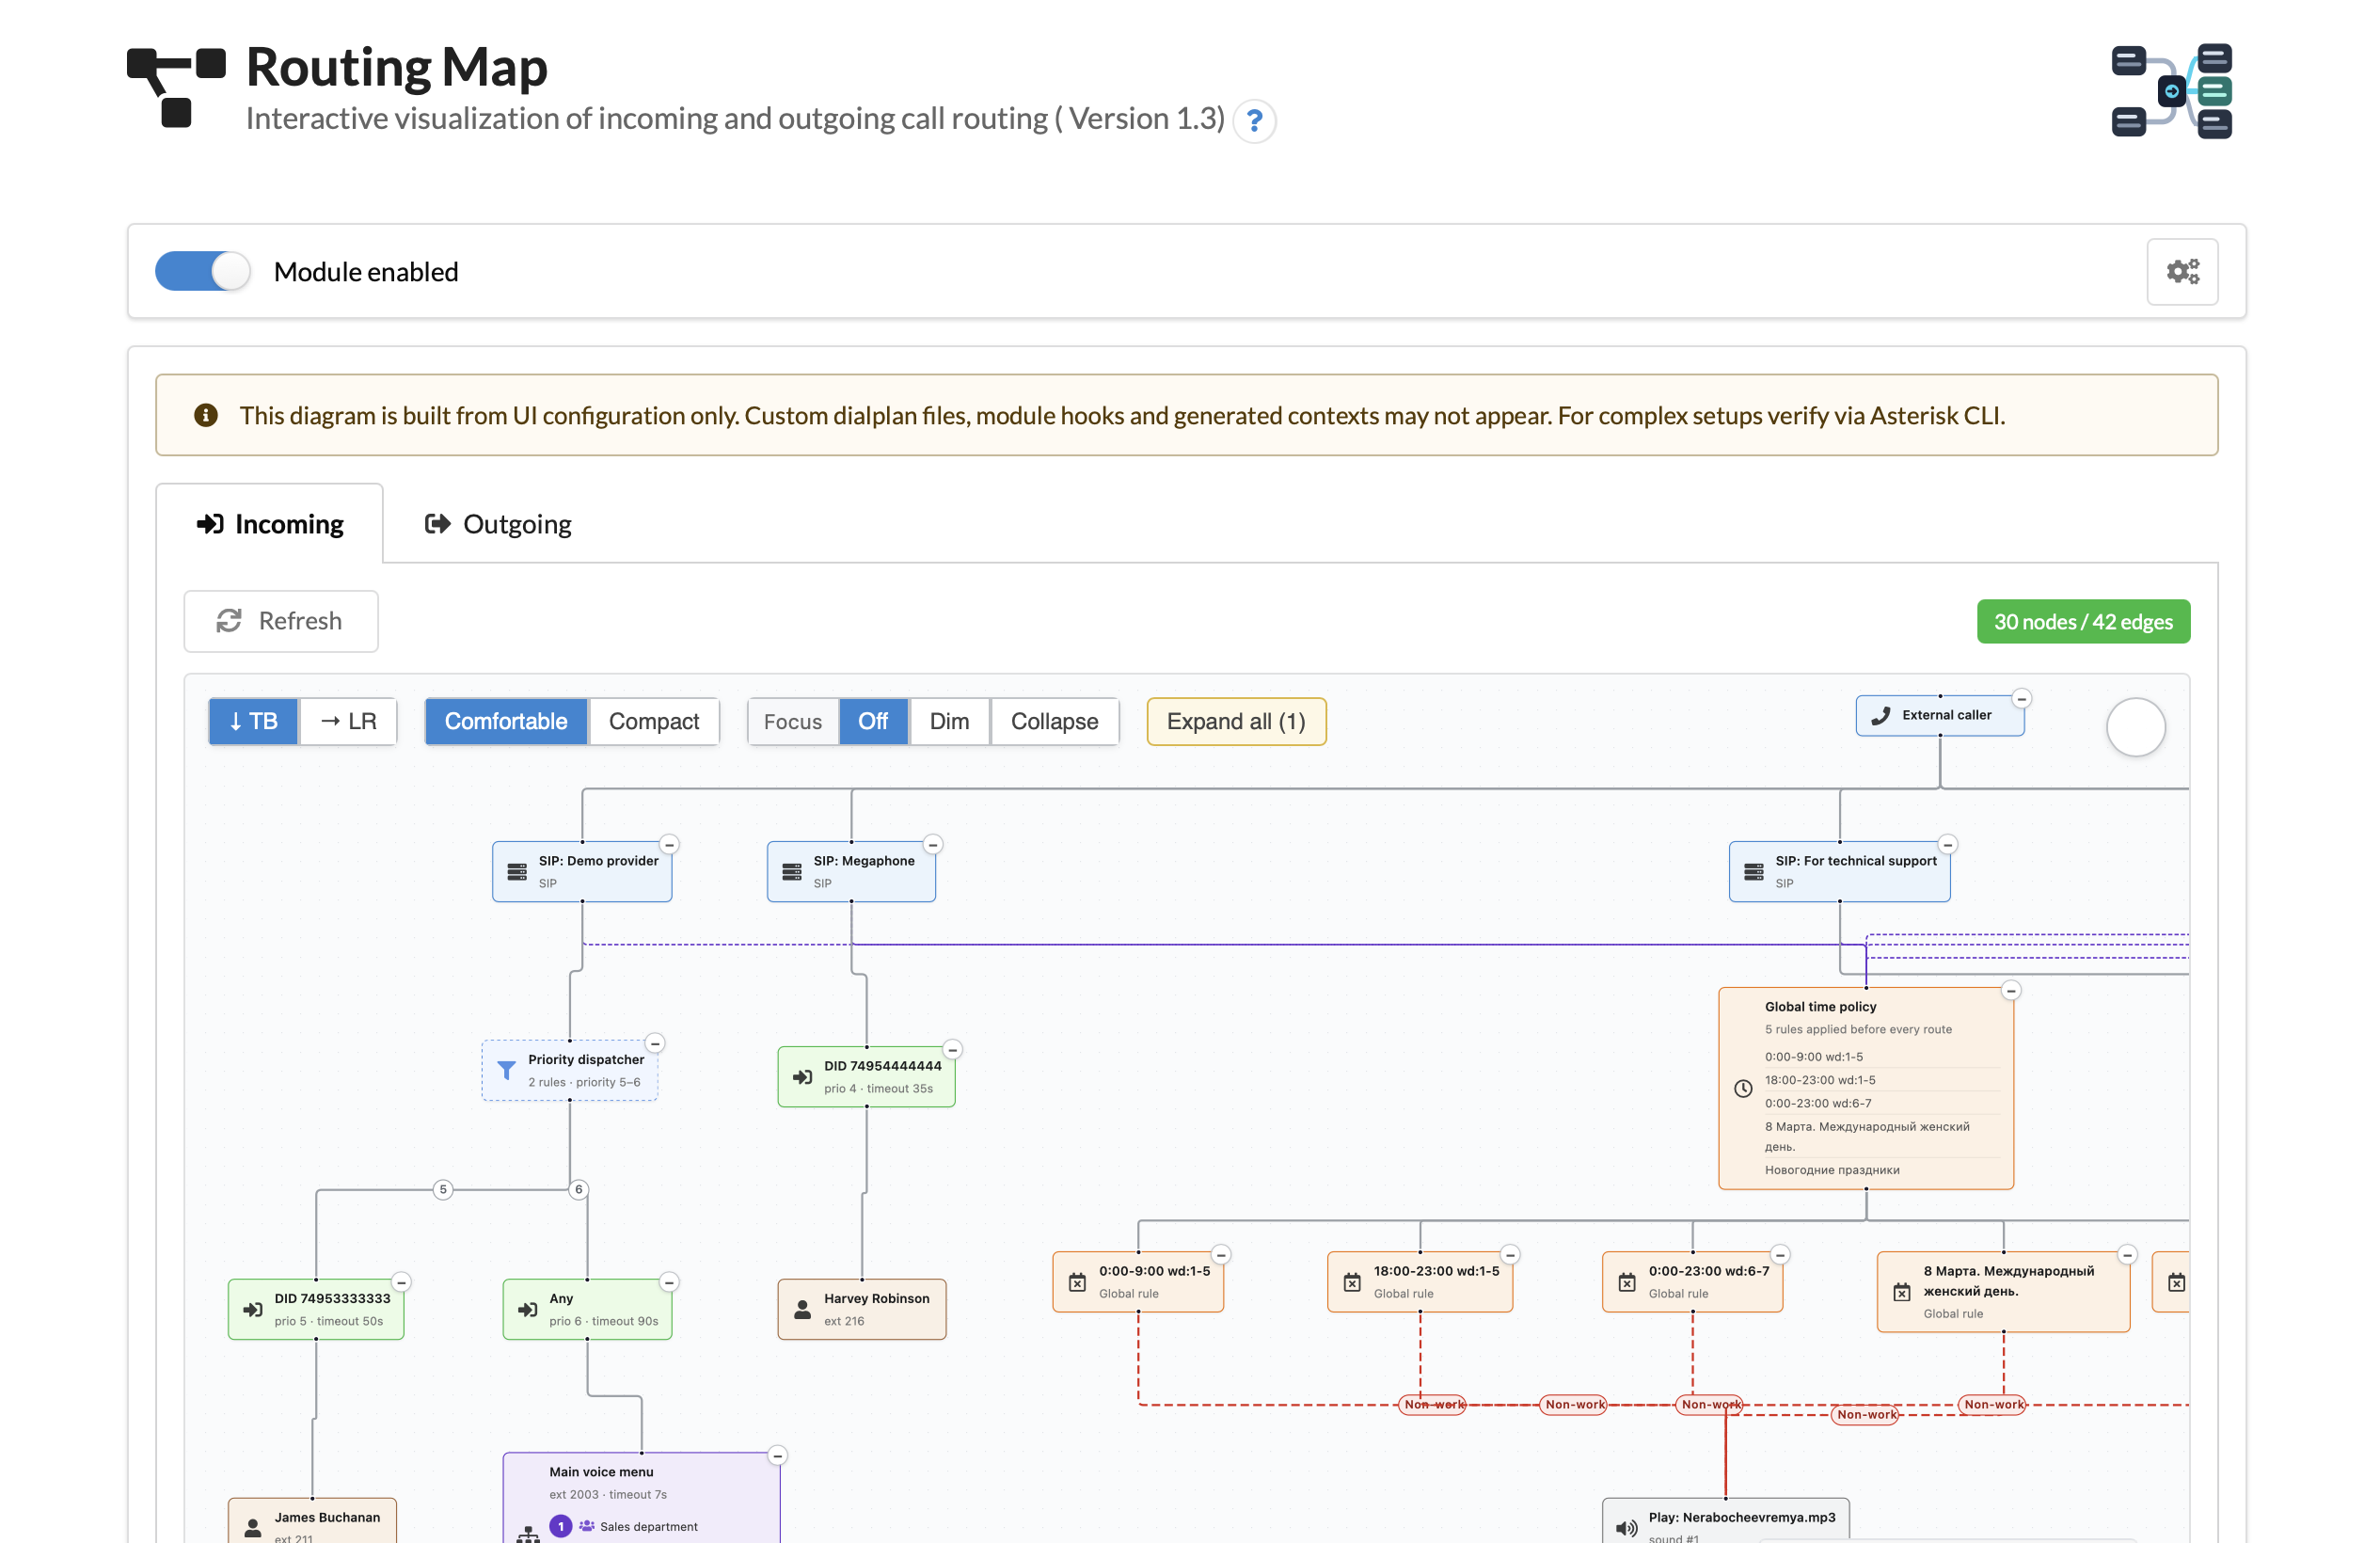
The **Call Routing Map** module shows incoming and outgoing call routing as an interactive read-only diagram. It collects providers, DID routes, time conditions, IVR menus, queues, conferences, applications and extensions from the current MikoPBX configuration and displays them as a clickable graph.
Call Routing Map overview
## What it does
* Shows the full call path on one screen instead of forcing you to open several routing pages.
* Builds the diagram automatically from MikoPBX settings. There is no separate diagram editor and no extra configuration database.
* Opens the corresponding admin page when you click a graph node: provider, route, IVR menu, queue, extension and other supported objects.
* Works in read-only mode. The module does not change Asterisk dialplan files and does not modify MikoPBX routing tables.
* Provides separate views for incoming and outgoing routing.
## Installation
1. Open the MikoPBX web interface.
2. Go to **Modules** → **Marketplace**.
3. Find **Call Routing Map** and install it.
4. Open **Modules** → **Installed** and enable the module.
For manual installation, download the module archive from the project releases page and upload it through **Modules** → **Installed** → **Upload module**.
## Using the module
1. Open **Modules** → **Call Routing Map**.
2. The **Incoming** tab opens by default and shows how external calls move from providers and DID routes to their destinations.
3. Drag the canvas to pan, use the mouse wheel to zoom, and use the minimap to navigate large diagrams.
4. Click **Refresh** after changing routing settings elsewhere in the web interface.
5. Click a node to open the matching MikoPBX settings page.
{% hint style="info" %}
The diagram is generated from the configuration available in the MikoPBX web interface. Custom dialplan files, `extensions_custom.conf` overrides, hooks from other modules and runtime-generated contexts are not displayed.
{% endhint %}
## Incoming routing
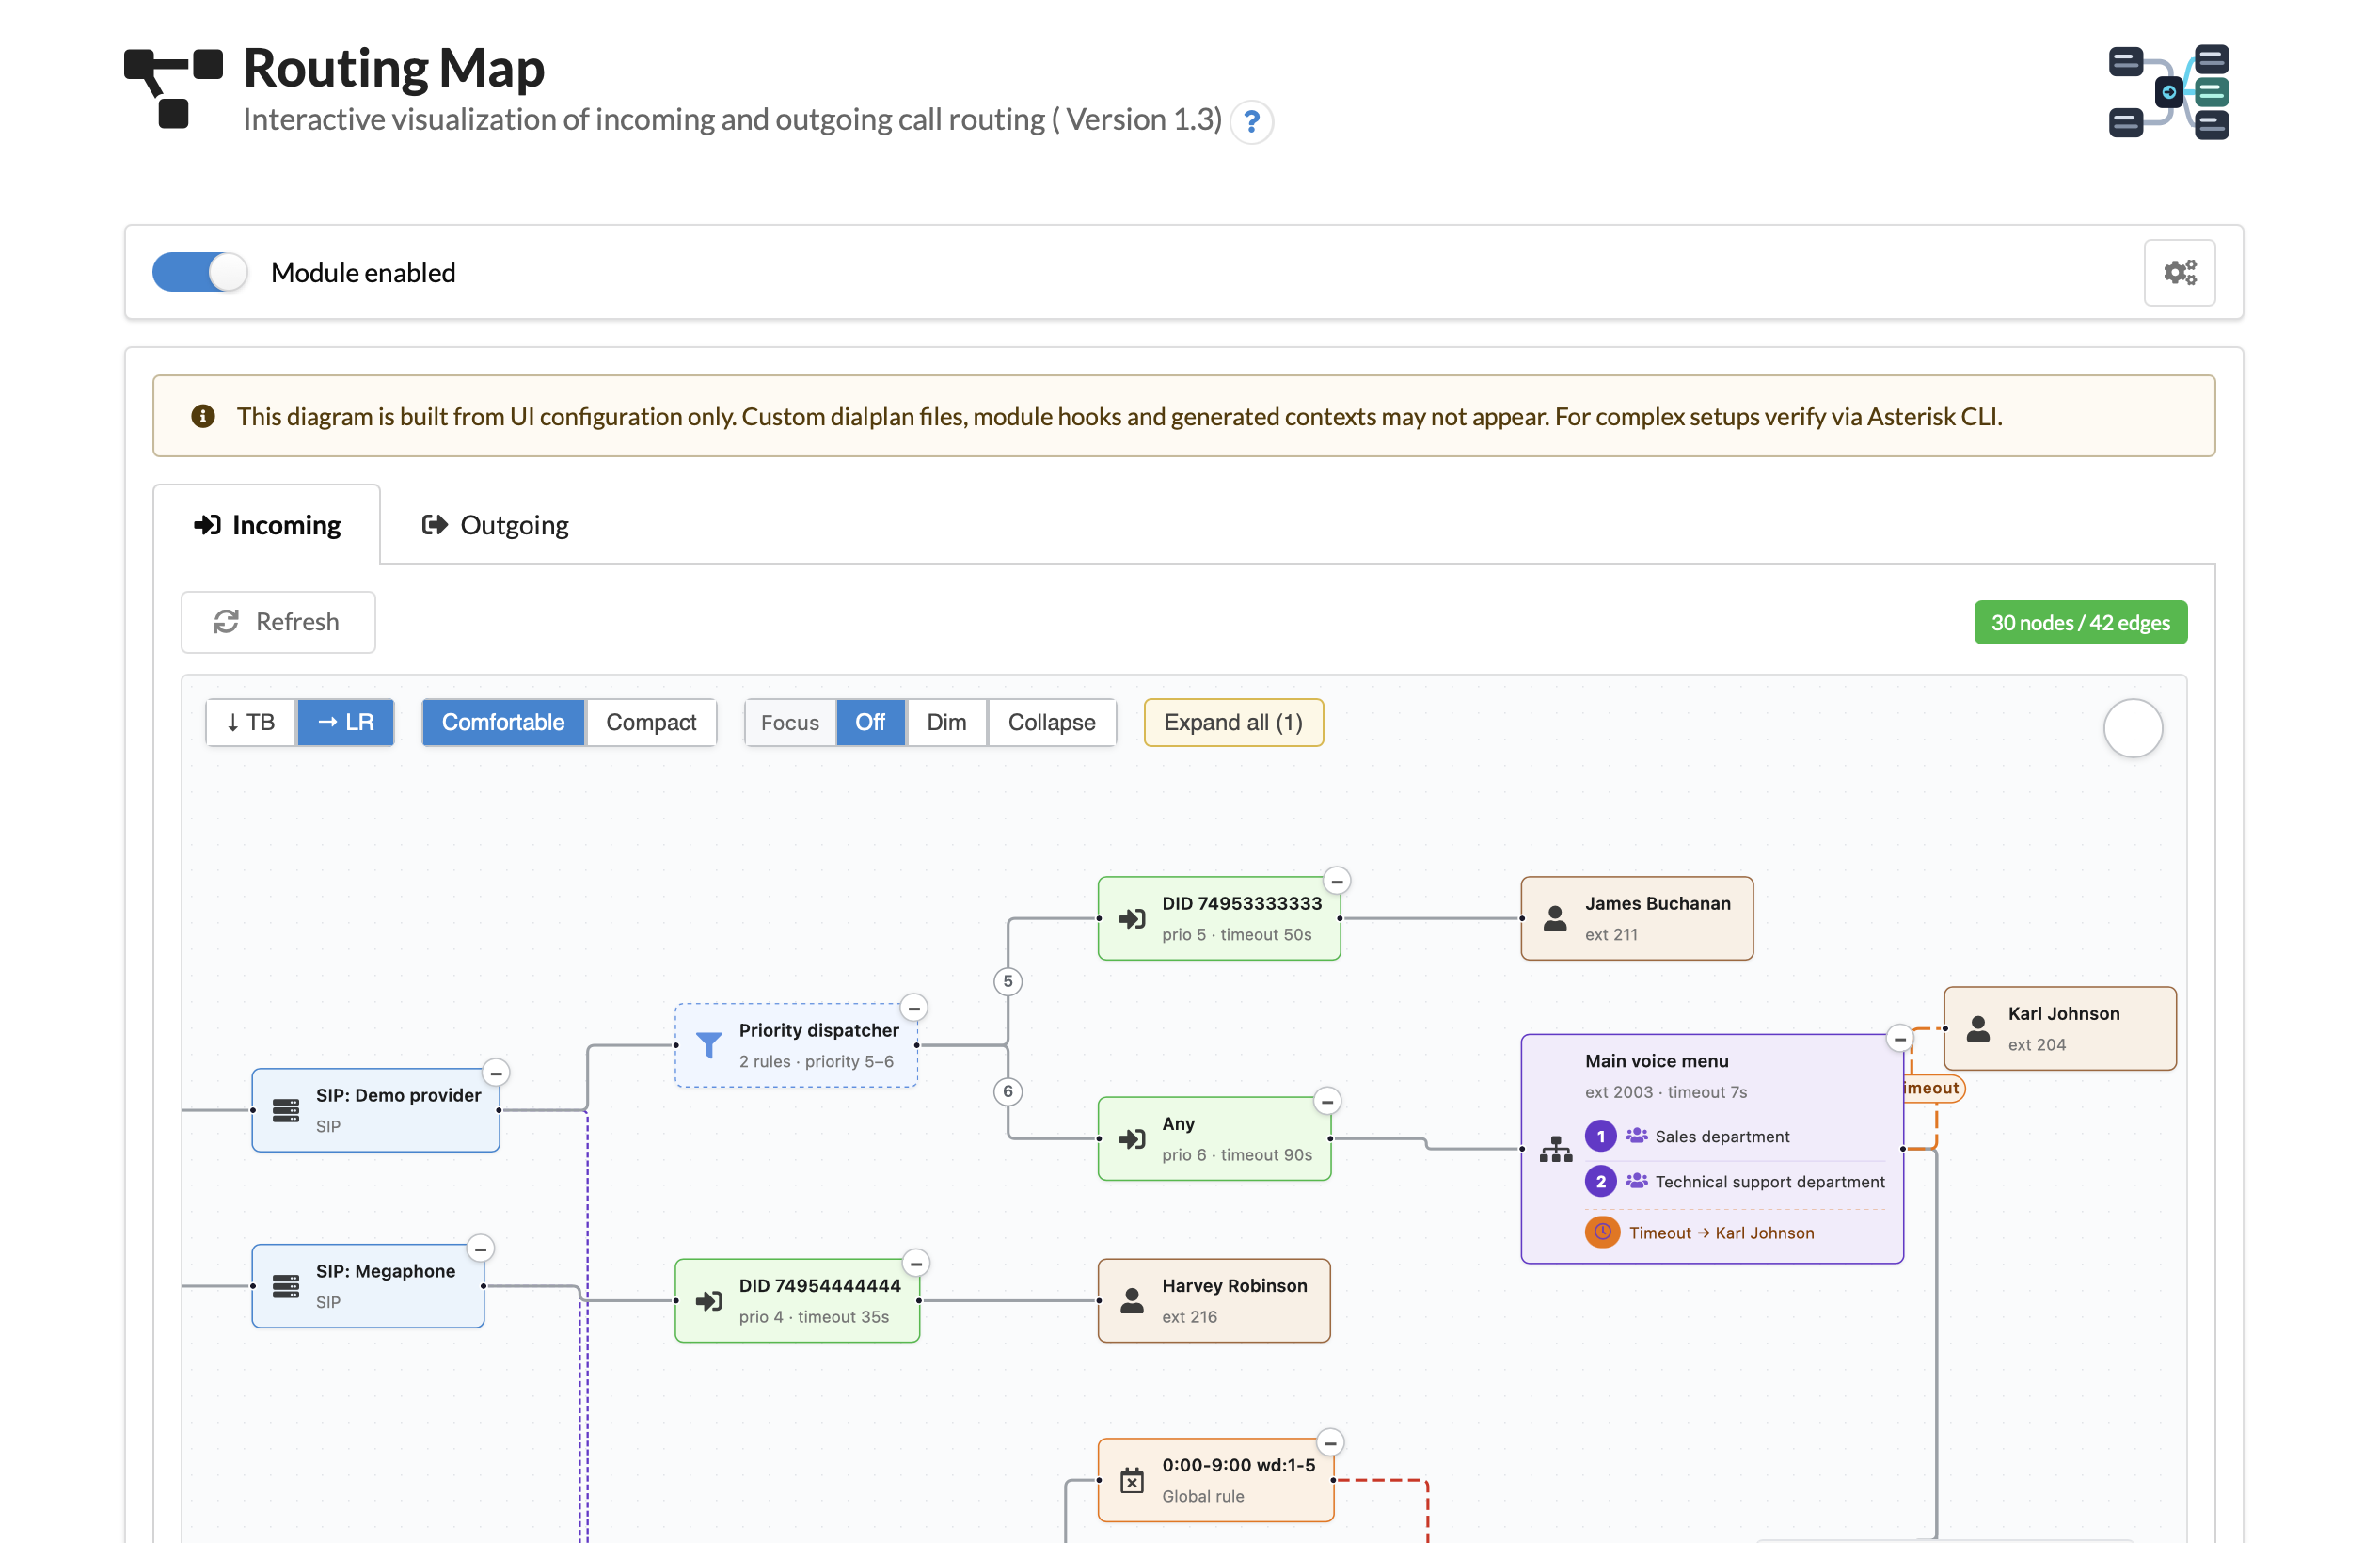
The **Incoming** tab helps audit how external calls are processed. It can include providers, DID routes, time conditions, IVR menus, queues, extensions, conferences and dialplan applications.
Incoming routing diagram
Typical use cases:
* Check which DID numbers are connected to which destinations.
* See how non-working time conditions affect the route.
* Follow the path from a provider to an IVR menu, queue or employee.
* Quickly open a route, queue or extension settings page from the graph.
## Outgoing routing
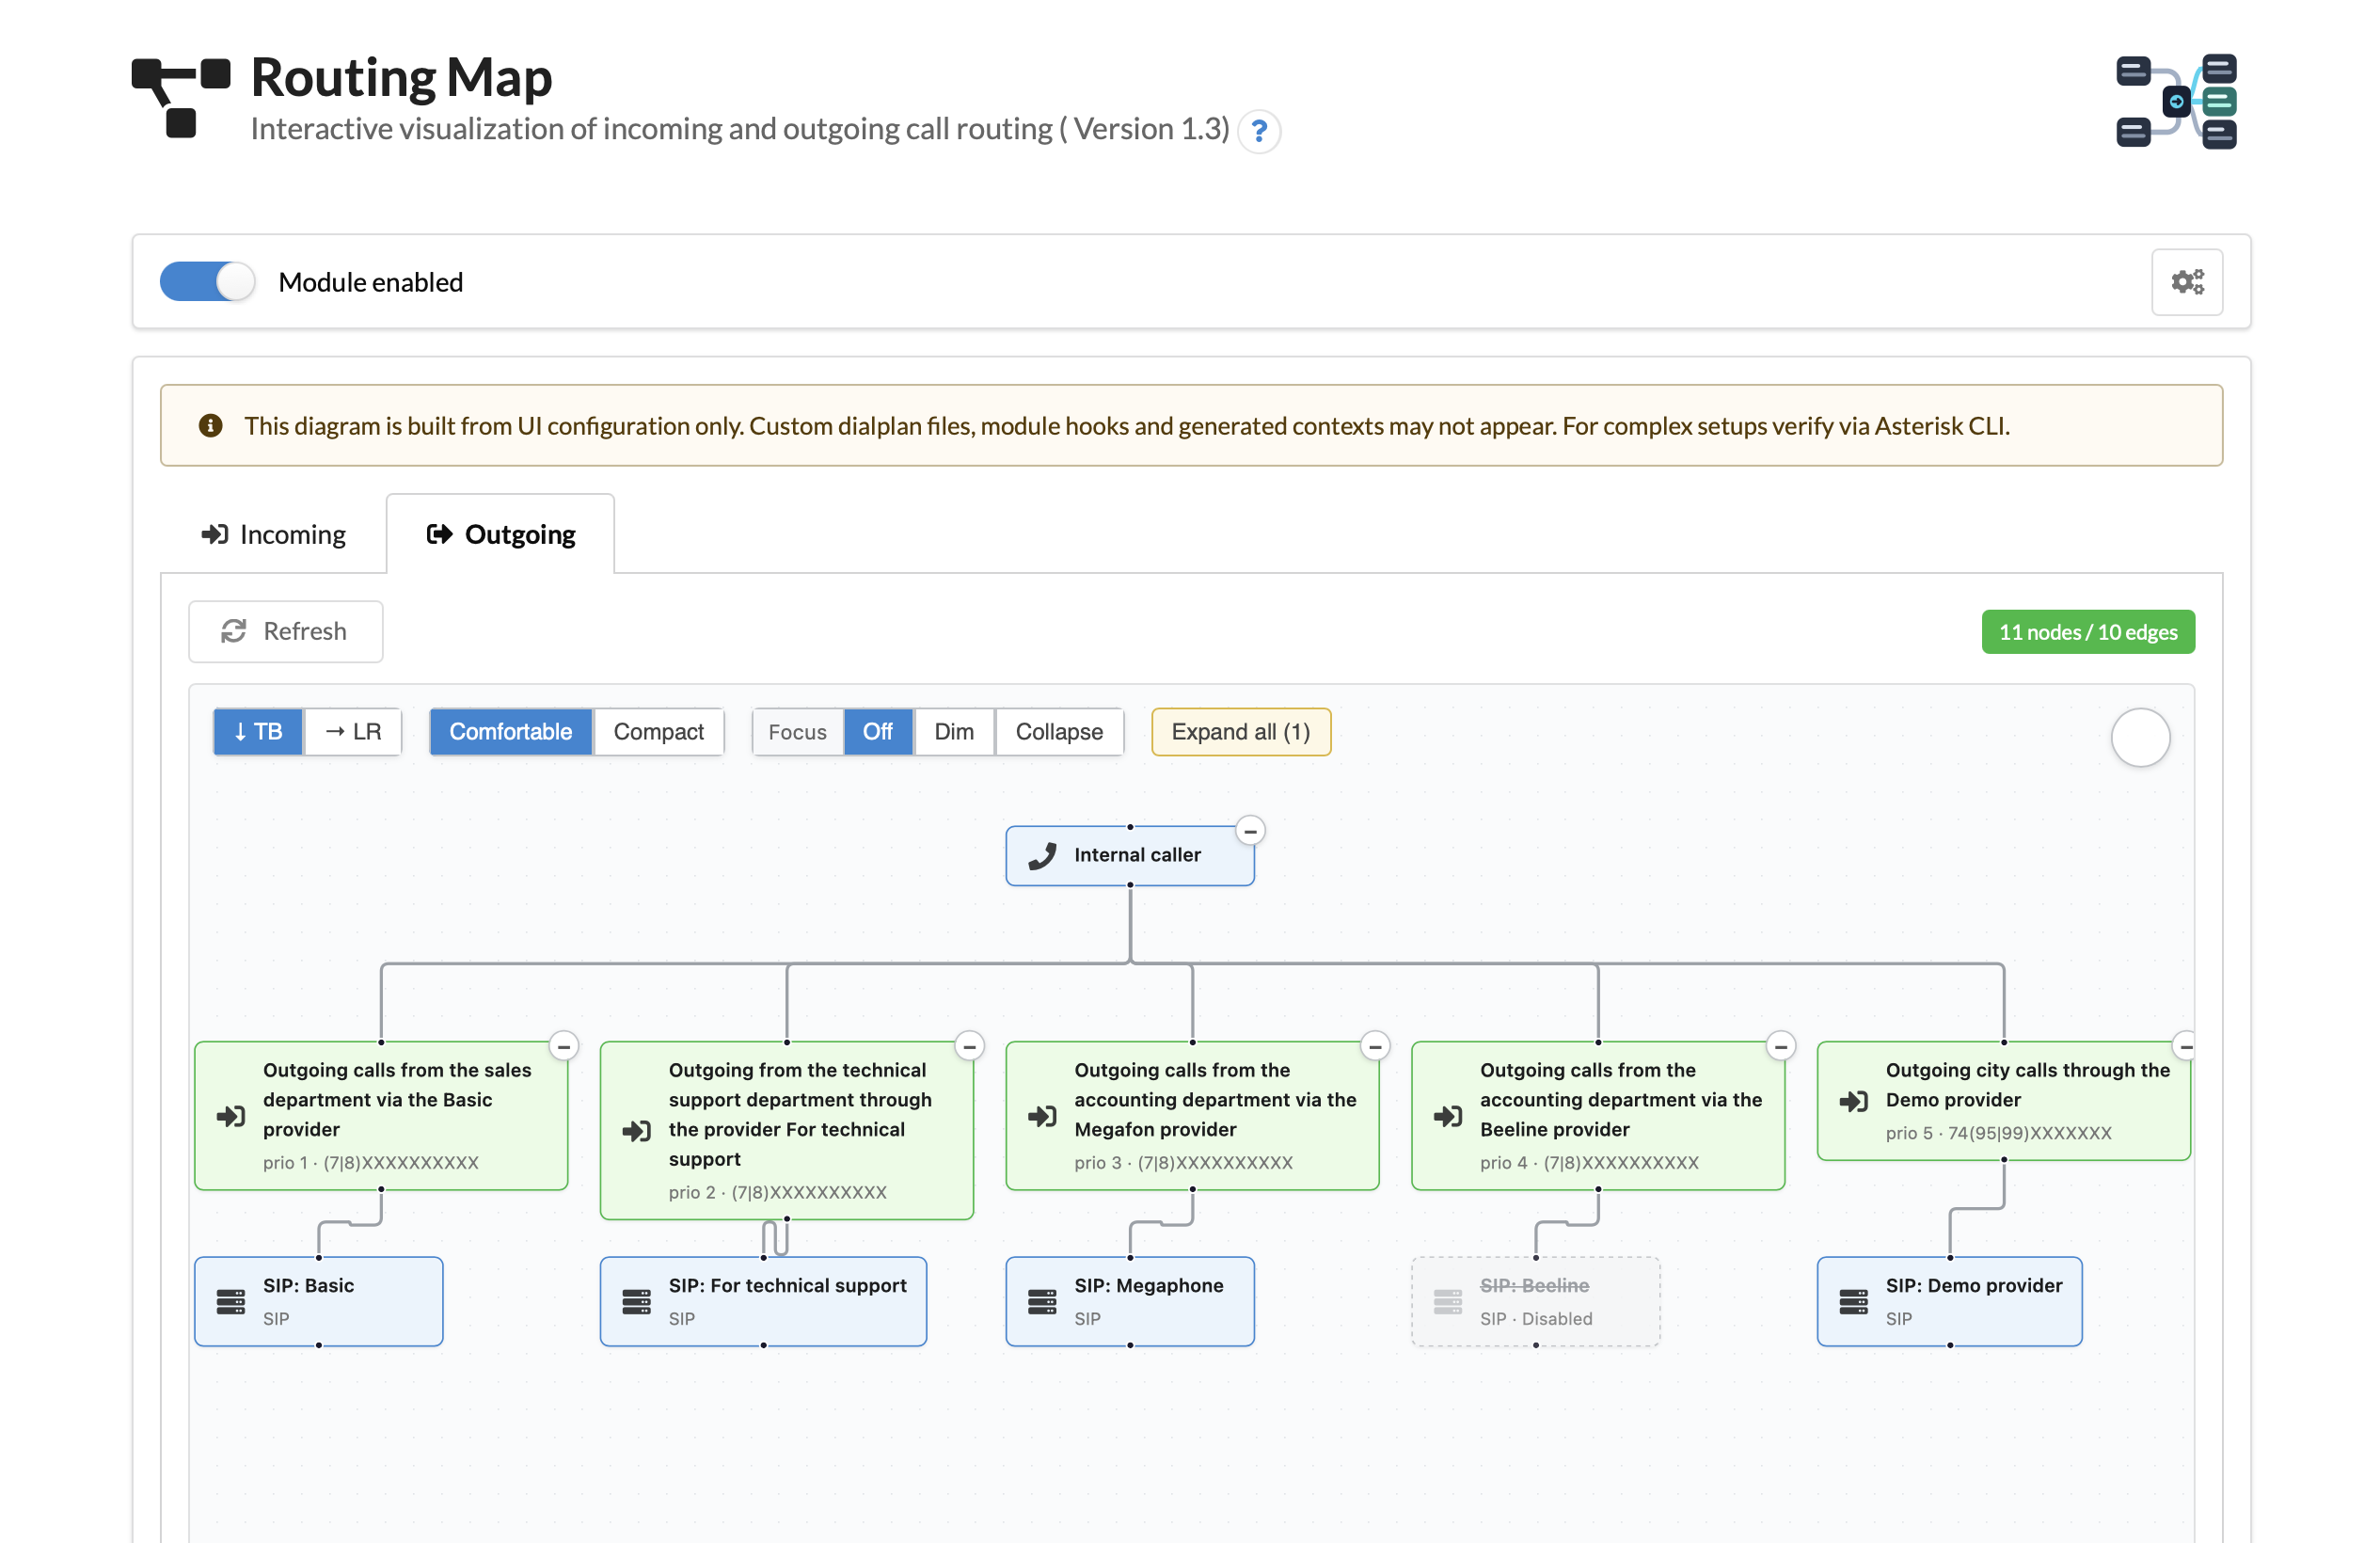
The **Outgoing** tab shows which dial patterns are routed through which providers. This is useful when checking provider priority, fallback rules and number templates.
Outgoing routing diagram
## Node types
The diagram uses different visual styles for supported object types:
* Provider
* Route / DID
* Time condition
* IVR menu
* Call queue
* Extension
* Conference
* Application
The built-in legend shows the node types that are present in the currently opened diagram.
## REST API
The module exposes a read-only REST API v3 under `/pbxcore/api/v3/module-routing-map/`. Authentication is available from localhost or with a Bearer token.
| Method | Endpoint | Description |
| ------ | ---------------- | --------------------------------------------------------- |
| GET | `graph:incoming` | Returns the incoming routing graph as `{ nodes, edges }`. |
| GET | `graph:outgoing` | Returns the outgoing routing graph as `{ nodes, edges }`. |
Example request:
```bash
curl -H "Authorization: Bearer $TOKEN" \
https://pbx.example.com/pbxcore/api/v3/module-routing-map/graph:incoming
```
Example response fragment:
```json
{
"nodes": [
{
"id": "provider-1",
"type": "provider",
"data": {
"label": "SIP-Trunk",
"href": "/admin-cabinet/providers/modify/1"
}
}
],
"edges": [
{
"id": "e-provider-1-route-42",
"source": "provider-1",
"target": "route-42"
}
]
}
```
## Requirements and limitations
* MikoPBX **2025.1.1+**.
* Modern browser with ES2017 support.
* The graph is a configuration snapshot, not a live call monitor.
* Editing routing directly from the graph is intentionally not supported.
{% hint style="info" %}
Module source code and issue tracker are available on GitHub: [mikopbx/ModuleRoutingMap](https://github.com/mikopbx/ModuleRoutingMap).
{% endhint %}
---
# Agent Instructions
This documentation is published with GitBook. GitBook is the documentation platform designed so that both humans and AI agents can read, navigate, and reason over technical content effectively. Learn more at gitbook.com.
## Querying This Documentation
If you need additional information that is not directly available in this page, you can query the documentation by asking a question.
Perform an HTTP GET request on the following URL with the `ask` and `goal` query parameters:
```
GET https://docs.mikopbx.com/mikopbx/english/modules/miko/module-routing-map.md?ask=&goal=
```
`ask` is the immediate question: it should be specific, self-contained, and written in natural language.
`goal` is what the user is ultimately trying to achieve, the reason they need the answer. Sharing it helps GitBook give you a better, more relevant answer. A goal is most helpful when it describes the outcome the user wants rather than restating the question. For example, with `ask=how do I create an API token`, a goal like `automate deployments from our CI pipeline` lets GitBook tailor the answer to that use case.
The response will contain a direct answer to the question and relevant excerpts and sources from the documentation.
Use this mechanism when the answer is not explicitly present in the current page, you need clarification or additional context, or you want to retrieve related documentation sections.