> For the complete documentation index, see [llms.txt](https://docs.mikopbx.com/mikopbx/llms.txt). Markdown versions of documentation pages are available by appending `.md` to page URLs; this page is available as [Markdown](https://docs.mikopbx.com/mikopbx/faq/ip-telefones/fanvil-x3sp.md).
# Fanvil X3SP
Подключение и настройка телефона Fanvil X3SP
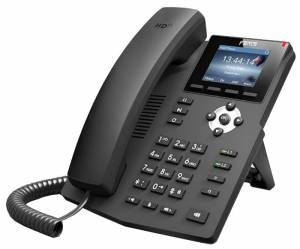
IP-телефон Fanvil X3SP сочетает современный дизайн, HD-качество звука и интуитивно понятный интерфейс, обеспечивая легкость в настройке и установке.
Телефон Fanvil X3SP
{% hint style="info" %}
Убедитесь, что в разделе "**Система**" -> "**Общие настройки**" -> "**Аудио/Видео кодеки**", кодек **G.711 A-law** включен.
{% endhint %}
## Настройки внутри раздела "Сотрудники"
1. Перейдите в web-интерфейс MikoPBX. В раздел **«Телефония» -> «Сотрудники»:**
Раздел "Сотрудники"
2. Напротив учетной записи сотрудника, которого Вы будете подключать к телефону, скопируйте пароль для SIP:
Копирования пароля для SIP
## Настройка телефона
1. Подключите телефон к сети ethernet, используя порт с надписью "**internet".**
{% hint style="info" %}
Если в вашей сети настроен DHCP сервер, то телефон получит IP адрес автоматически.
{% endhint %}
2. Нажмите на клавишу "OK" на, чтобы узнать IP-адрес телефона, по которому к нему будет произодиться подключение из браузера. Далее адрес будет отображен на экране телефона.
3. Перейдите по ссылке в вашем браузере.
{% hint style="info" %}
Стандартные данные для первой авторизации:
* Username: admin
* Login: admin
{% endhint %}
Форма авторизации
4. Перейдите в раздел "**Аккаунт**".
Раздел "Аккаунт"
5. Заполните следующие параметры:
* «**Имя пользователя**» - внутренний номер сотрудника.
* «**Имя регистрации**» - внутренний номер сотрудника.
* «**Пароль**» - пароль для SIP из карточки сотрудника в MikoPBX.
* «**Адрес SIP-сервера**» - адрес MikoPBX.
Перейдите в расширенные настройки и заполните следующие параметры:
* Укажите «**Caller ID Header**» в значение «**PAI-RPID-FROM**».
* «**Приоритет гарнитуры**» установите в значение «**Вкл.**».
* Включите «**Интерком**».
Сохраните настройки нажав кнопку «**Применить**». Статус телефона отобразиться как «**Зарегистрированно**».
Параметры SIP аккаунта
После успешного подключения телефона, в интерфейсе MikoPBX индикатор состояния подключения загорится зелёным:
Индикатор успешного подключения в интерфейсе MikoPBX
---
# Agent Instructions
This documentation is published with GitBook. GitBook is the documentation platform designed so that both humans and AI agents can read, navigate, and reason over technical content effectively. Learn more at gitbook.com.
## Querying This Documentation
If you need additional information that is not directly available in this page, you can query the documentation by asking a question.
Perform an HTTP GET request on the following URL with the `ask` and `goal` query parameters:
```
GET https://docs.mikopbx.com/mikopbx/faq/ip-telefones/fanvil-x3sp.md?ask=&goal=
```
`ask` is the immediate question: it should be specific, self-contained, and written in natural language.
`goal` is what the user is ultimately trying to achieve, the reason they need the answer. Sharing it helps GitBook give you a better, more relevant answer. A goal is most helpful when it describes the outcome the user wants rather than restating the question. For example, with `ask=how do I create an API token`, a goal like `automate deployments from our CI pipeline` lets GitBook tailor the answer to that use case.
The response will contain a direct answer to the question and relevant excerpts and sources from the documentation.
Use this mechanism when the answer is not explicitly present in the current page, you need clarification or additional context, or you want to retrieve related documentation sections.