> For the complete documentation index, see [llms.txt](https://docs.mikopbx.com/mikopbx/llms.txt). Markdown versions of documentation pages are available by appending `.md` to page URLs; this page is available as [Markdown](https://docs.mikopbx.com/mikopbx/faq/voip-gateways/goip4/sms-to-telegram.md).
# SMS в Telegram
Настройка SMS в Telegram для шлюза GoIP4
## Настройки в Telegram
Для начала через чат Telegram следует написать боту [**@BotFather**](https://t.me/BotFather). Этот бот позволит создать и настроить вашего нового бота для интеграции с MIKOPBX.
1. Отправляем боту команду
```
/start
```
2. Команда создания нового бота:
```
/newbot
```
3. Отправляем имя нашего нового бота. К примеру:
```
MIKOPBX_NEW_BOT
```
4. Сохраните значение «**token**»: он понадобится для настройки со стороны АТС.
5. Создайте новую «**группу**».
6. Перешлите любое сообщение из группы боту [@getmypid\_bot](https://t.me/getmyid_bot)
7. Сохраните значение «chat ID», для пользователя значение вида "**190389360"**, для группы - отрицательное, вида: "**-4190389360".**
## Настройки в MikoPBX
### Приложение Dialplan
В разделе «**Модули**» - «**Приложения диалплан**» создадите новое приложения, со следующими параметрами:
* "**Название**" - Переслать sms в telegram (произвольное).
* "**Тип кода**" - PHP-AGI
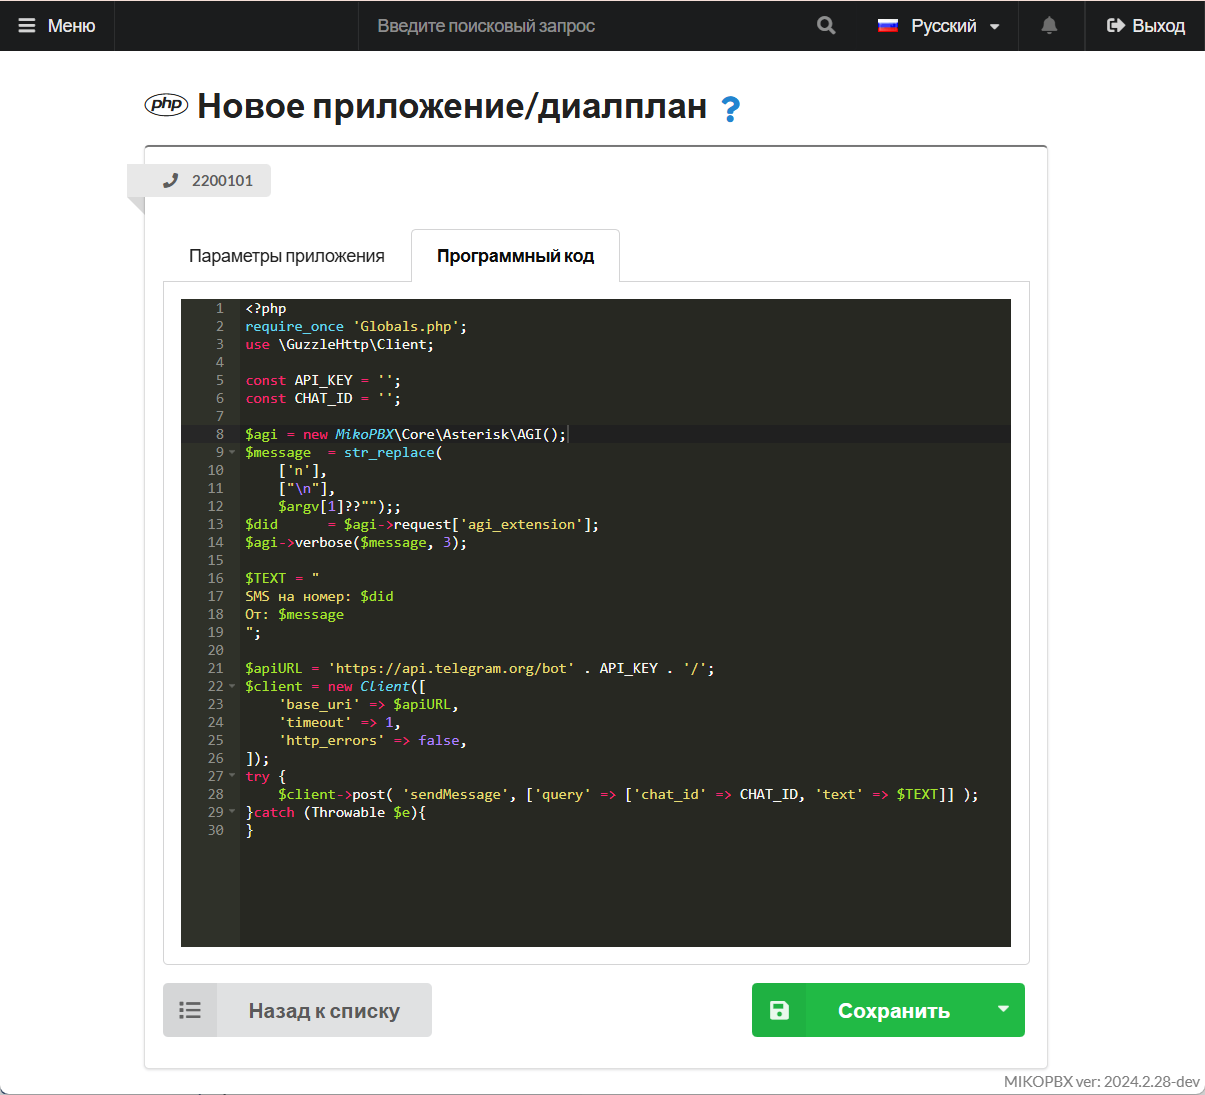
* Программный код:
```php
request['agi_extension'];
$agi->verbose($message, 3);
$TEXT = "
SMS на номер: $did
От: $message
";
$apiURL = 'https://api.telegram.org/bot' . API_KEY . '/';
$client = new Client([
'base_uri' => $apiURL,
'timeout' => 1,
'http_errors' => false,
]);
try {
$client->post( 'sendMessage', ['query' => ['chat_id' => CHAT_ID, 'text' => $TEXT]] );
}catch (Throwable $e){
}
```
{% hint style="info" %}
«**API\_KEY**» - токен телеграм бота
«**CHAT\_ID**» - идентификатор телеграм чата (группы).
{% endhint %}
Программный код для диалплана
\
В адресной строке браузера нужно скопировать идентификатор приложения, он имеет вид: «**DIALPLAN-APP-8B0D0964**»:
Идентификатор приложения диалплана
### Кастомизация системных файлов
1. Перейдите в раздел "**Система**" -> "**Кастомизация системных файлов**":
Раздел "Кастомизация системных файлов"
2. Перейдите к редактированию файла "**/etc/asterisk/extensions.conf",** установите режим **"Добавлять в конец файла".** Используйте следующий код:
```php
[messages-from-goip]
exten => _[0-9*#+a-zA-Z]!,1,AGI(DIALPLAN-APP-8B0D0964.php, "${MESSAGE(body)}")
same => n,hangup()
exten => _[hit],1,Hangup()
```
{% hint style="info" %}
«**DIALPLAN-APP-8B0D0964**» - в данном коде - это идентификатор приложения. Сохраните изменения.
{% endhint %}
Изменения в файле extensions.conf
### Провайдер
1. Перейдите в раздел "**Маршрутизация**" -> "**Провайдеры телефонии**". Добавьте нового SIP-провайдера, со следующими параметрами:
* "**Название**" - произвольное
* **"Тип учетной записи"** - Аутентификация по IP адресу, без пароля.
* "**Хост или IP адрес**" - IP-адрес Вашего шлюза
## Настройка GoIP
1. Перейдите в раздел «**Configurations**» - «**SMS**»
2. Для каждого канала CH1 / CH2 … CHN выполните настройку:
* «**SMS to VoIP**» (верхнее) - «**Call Function**»
* «**Call mode**» - «**Mode 1**»
* «**SMS to VoIP**» (нижнее) - укажите номер телефона sim карты
Параметры в GoIP
---
# Agent Instructions
This documentation is published with GitBook. GitBook is the documentation platform designed so that both humans and AI agents can read, navigate, and reason over technical content effectively. Learn more at gitbook.com.
## Querying This Documentation
If you need additional information that is not directly available in this page, you can query the documentation by asking a question.
Perform an HTTP GET request on the following URL with the `ask` and `goal` query parameters:
```
GET https://docs.mikopbx.com/mikopbx/faq/voip-gateways/goip4/sms-to-telegram.md?ask=&goal=
```
`ask` is the immediate question: it should be specific, self-contained, and written in natural language.
`goal` is what the user is ultimately trying to achieve, the reason they need the answer. Sharing it helps GitBook give you a better, more relevant answer. A goal is most helpful when it describes the outcome the user wants rather than restating the question. For example, with `ask=how do I create an API token`, a goal like `automate deployments from our CI pipeline` lets GitBook tailor the answer to that use case.
The response will contain a direct answer to the question and relevant excerpts and sources from the documentation.
Use this mechanism when the answer is not explicitly present in the current page, you need clarification or additional context, or you want to retrieve related documentation sections.