> For the complete documentation index, see [llms.txt](https://docs.mikopbx.com/mikopbx/llms.txt). Markdown versions of documentation pages are available by appending `.md` to page URLs; this page is available as [Markdown](https://docs.mikopbx.com/mikopbx/setup/cloud/google-cloud/marketplace.md).
# Google Cloud Маркетплейс
Установка MikoPBX в Google Cloud с помощью Маркетплейса
Авторизуйтесь на платформе
MikoPBX в Google Cloud Маркетплейс:
{% embed url="" %}
Приступим к настройке
{% hint style="info" %}
Для быстрого и удобного поиска на платформе Google Cloud используйте панель поиска
{% endhint %}
### **Добавление** ролей с**ервисной** учетной записи
Если у вас есть сервисная учетная запись, проверьте наличие нужных ролей, в случае необходимости добавьте их
Если сервисной учетной записи нет, создайте и добавьте ей нужные роли
1. Откройте Navigation menu / Products & solutions / Management / **IAM & Admin**
2. Перейдите к вкладке Service accounts и нажмите на **CREATE SERVICE ACCOUNT**
3. Введите имя сервисной учетной записи, например *mikopbx-service-account*
4. Нажмите кнопку **CREATE AND CONTINUE**
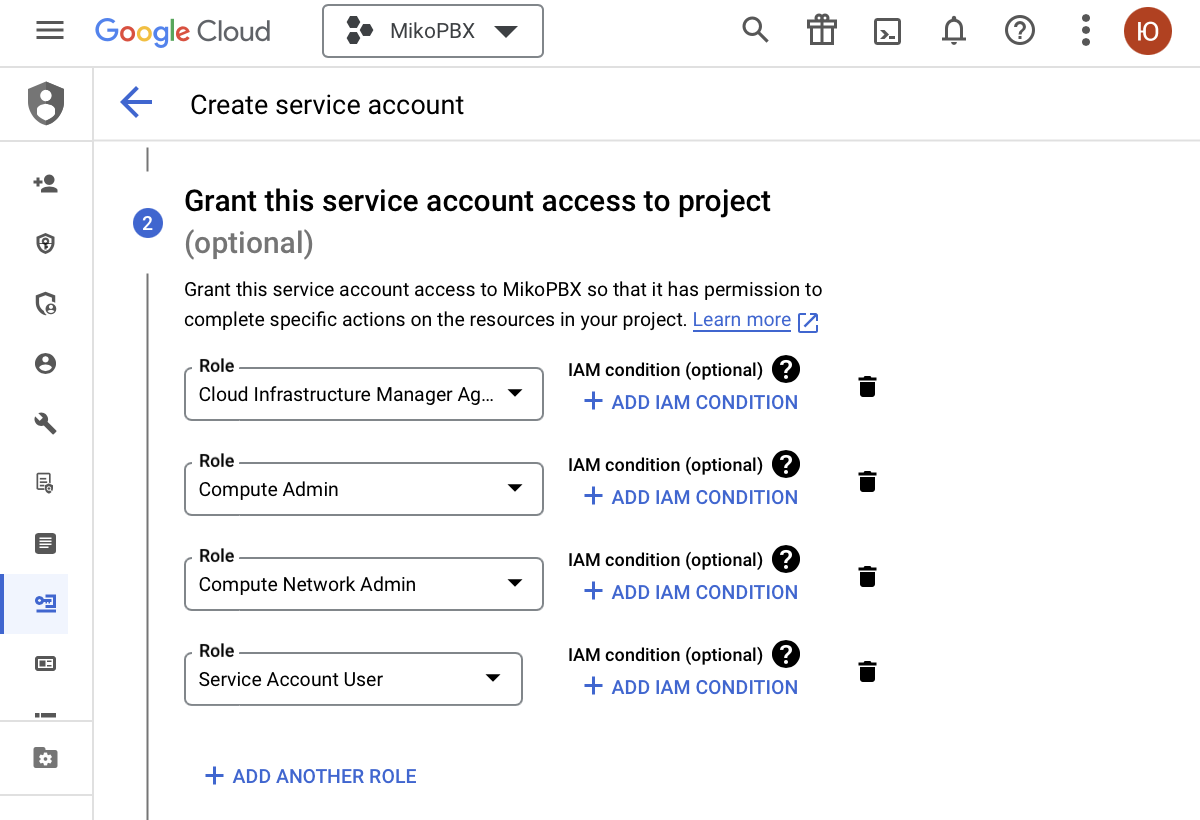
5. Добавьте роли **Cloud Infrastructure Manager Agent, Compute Admin, Compute Network Admin, Service Account User**
6. Нажмите кнопку **DONE**
### **Создание виртуальной машины**
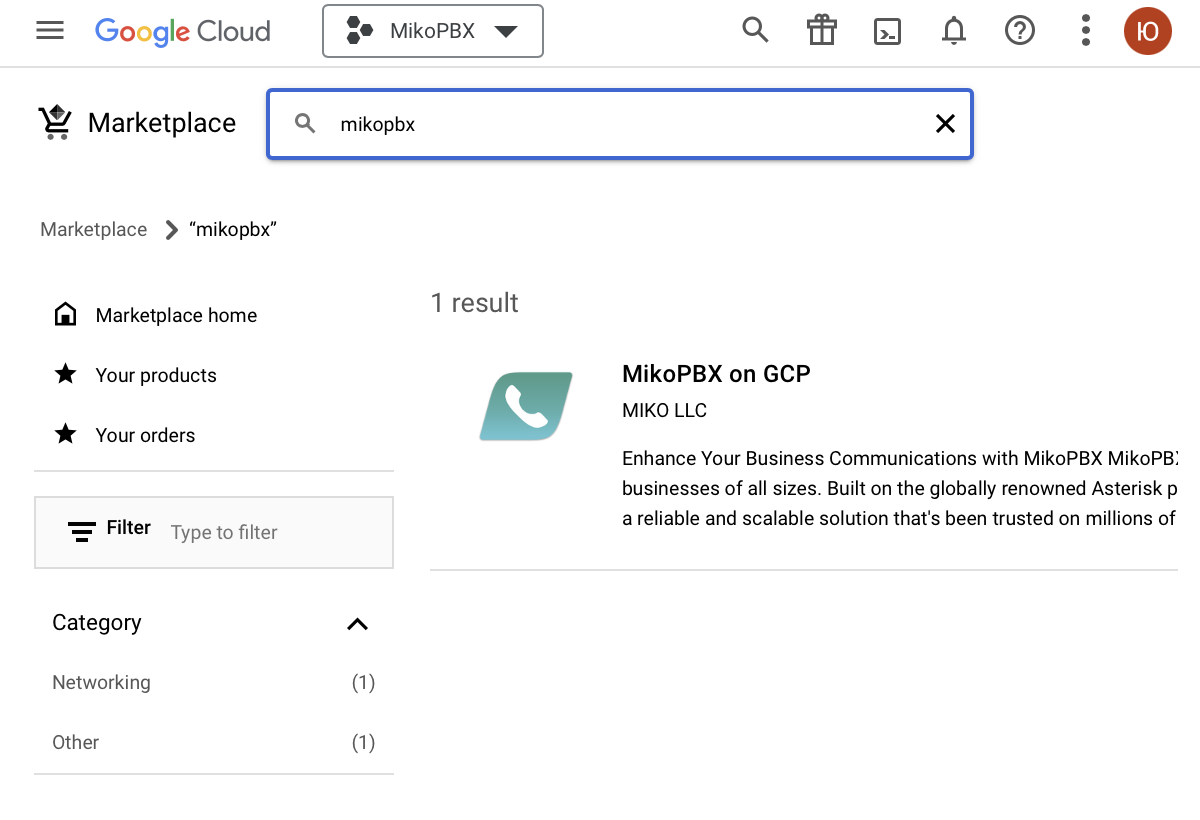
1. Откройте Marketplace и введите в поисковой строке **MikoPBX**
2. Выберите образ [MikoPBX](https://console.cloud.google.com/marketplace/product/mikopbx-public/mikopbx)
3. На открытой вкладке выберите **LAUNCH**
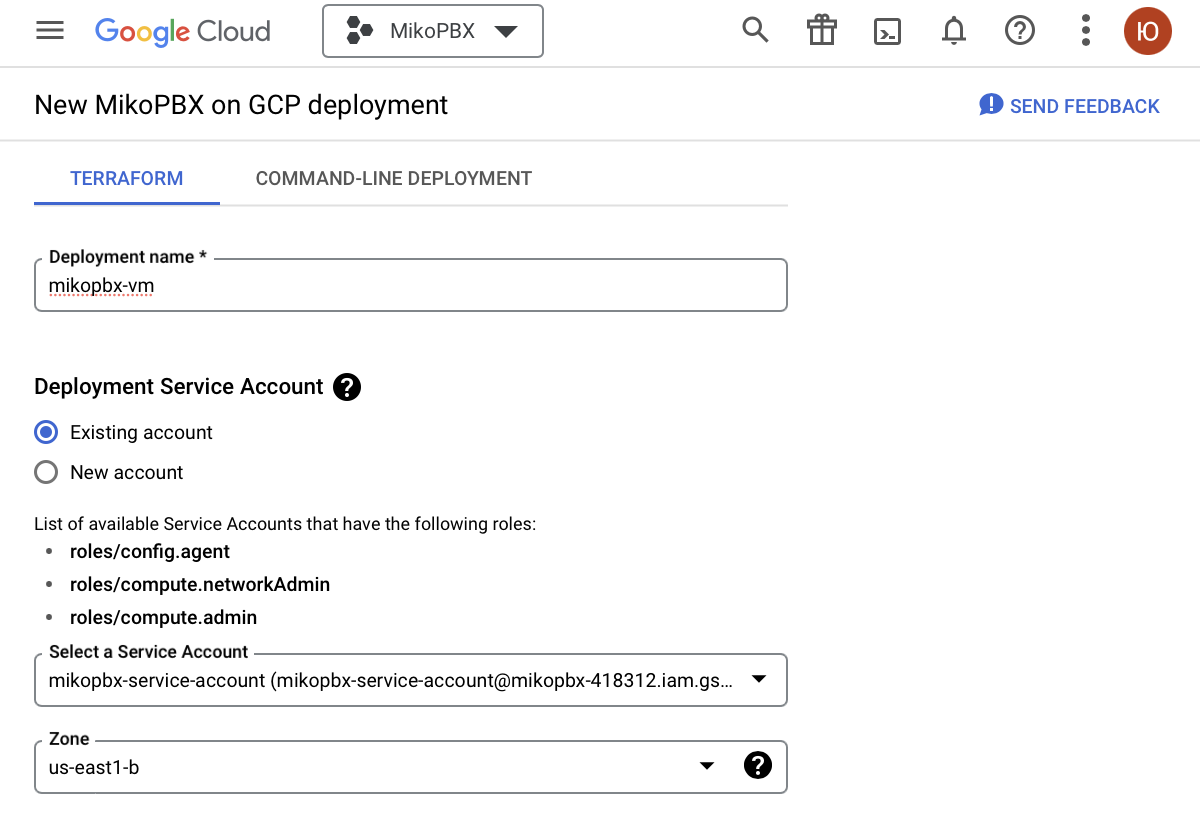
4. В поле Deployment name введите имя, например *mikopbx-vm*
5. В разделе Deployment Service Account установите флажок Existing account и выберите созданный ранее сервисный аккаунт
{% hint style="danger" %}
Для развертывания АТС используйте **два** диска:
* диск объемом **1 Гб** для основной системы
* диск объемом **50+ Гб** для хранения записей разговоров
{% endhint %}
6. При необходимости измените размер диска для хранения данных в разделе Data Storage, по умолчанию его размер - 50Гб
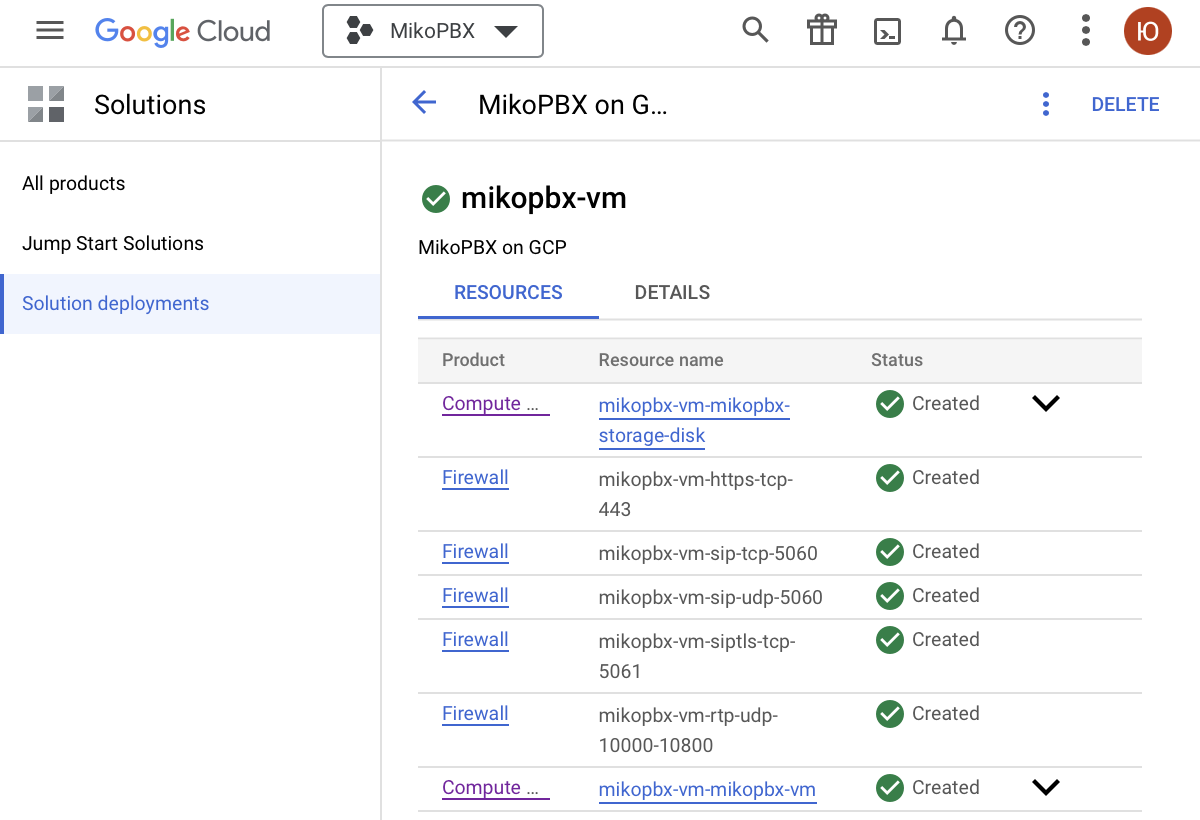
7. В разделе Networking все необходимые правила Firewall настраиваются автоматически
8. Для других полей используйте значения по умолчанию
9. Завершив ввод значений, нажмите кнопку **DEPLOY**
### **Запуск АТС MikoPBX**
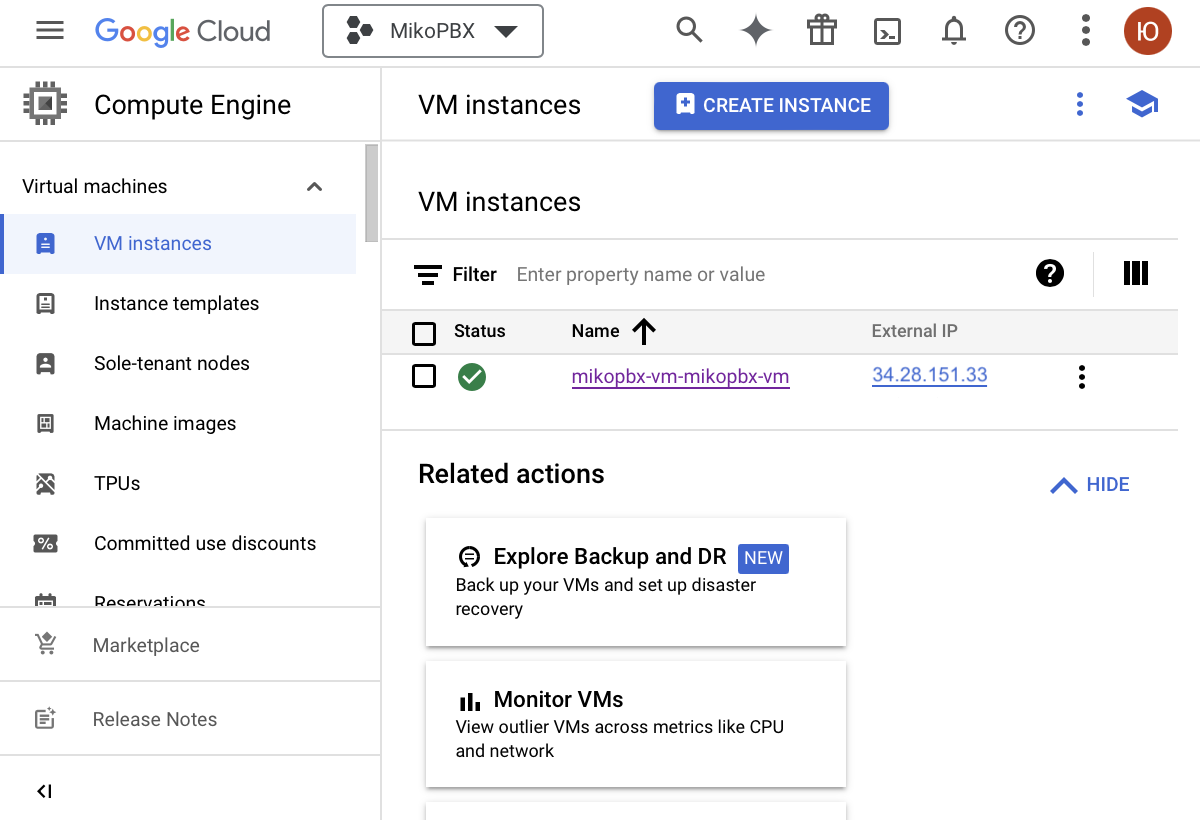
1. Откройте вкладку Compute Engine и перейдите в раздел Virtual machines / VM Instance
2. Перейдите к созданной виртуальной машине *mikopbx-vm-mikopbx-vm*
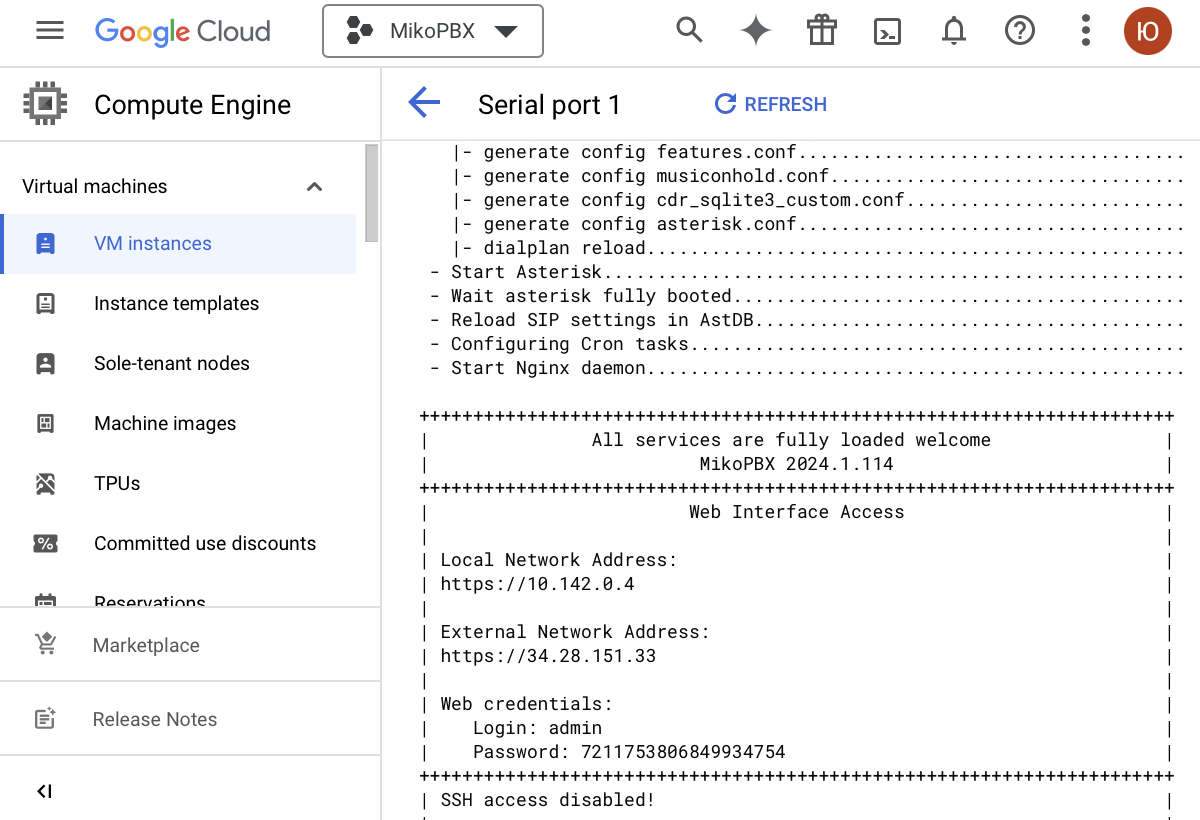
3. На открытой вкладке перейдите к Logs / Serial port 1 (console)
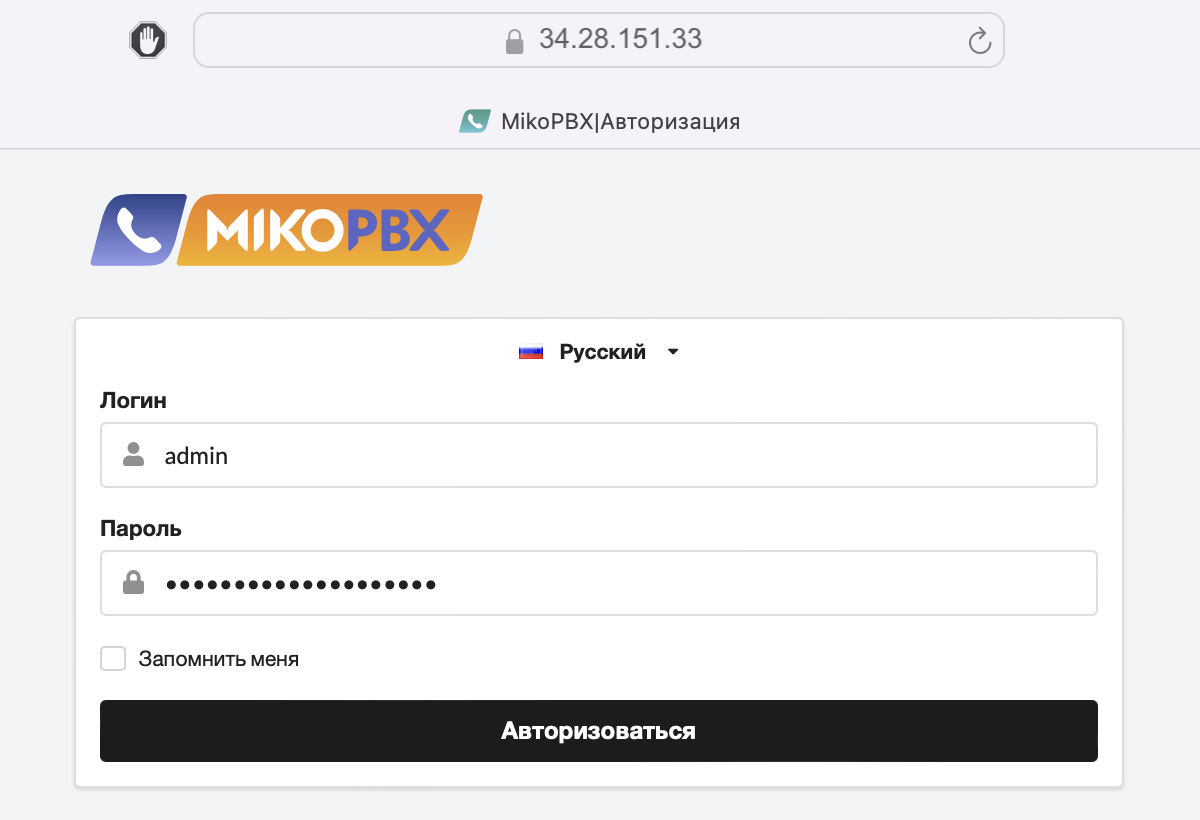
4. Скопируйте внешний адрес созданной виртуальной машины и введите его в строке браузера
5. Для входа используйте указанные в Serial port 1 (console) логин и пароль
---
# Agent Instructions
This documentation is published with GitBook. GitBook is the documentation platform designed so that both humans and AI agents can read, navigate, and reason over technical content effectively. Learn more at gitbook.com.
## Querying This Documentation
If you need additional information that is not directly available in this page, you can query the documentation dynamically by asking a question.
Perform an HTTP GET request on the current page URL with the `ask` query parameter, and the optional `goal` query parameter:
```
GET https://docs.mikopbx.com/mikopbx/setup/cloud/google-cloud/marketplace.md?ask=&goal=
```
`ask` is the immediate question: it should be specific, self-contained, and written in natural language.
`goal` is optional and describes the broader end goal you are ultimately trying to accomplish on behalf of the user. GitBook uses it to tailor the answer towards what is most useful for that goal.
The response will contain a direct answer to the question and relevant excerpts and sources from the documentation.
Use this mechanism when the answer is not explicitly present in the current page, you need clarification or additional context, or you want to retrieve related documentation sections.